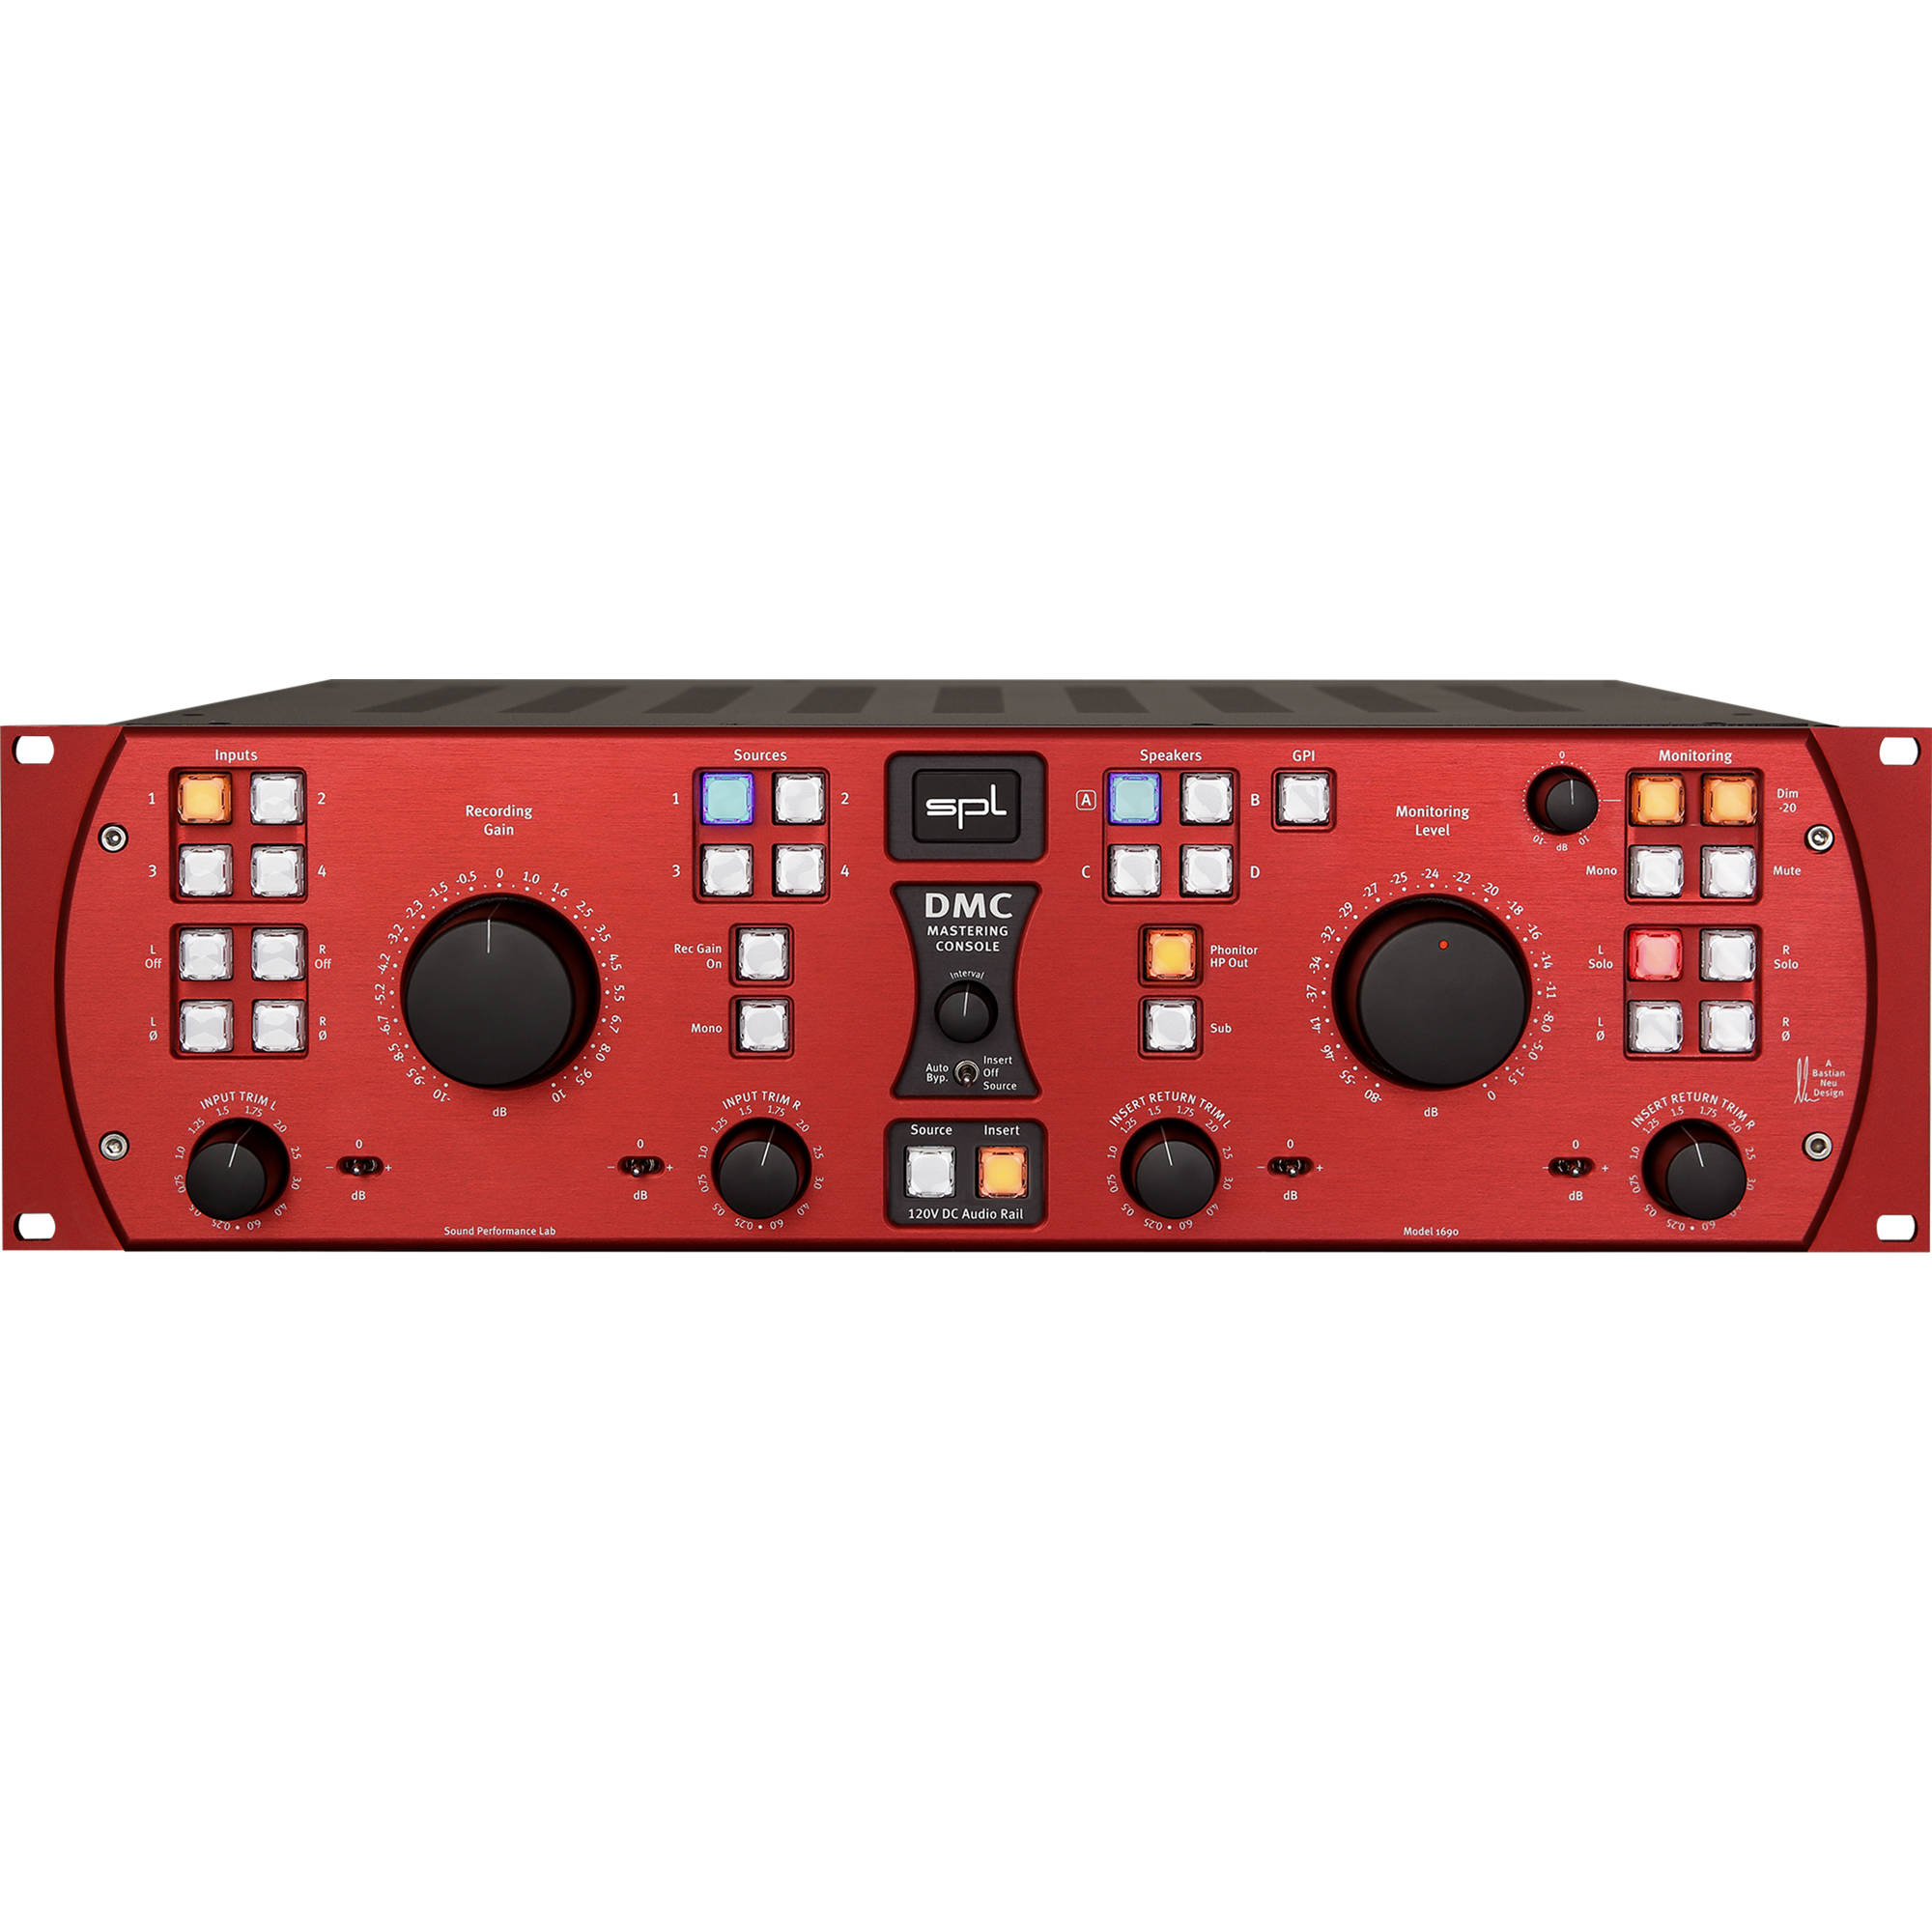
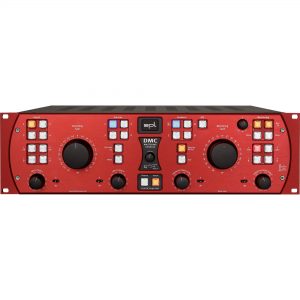
SPL DMC Overview1Description2Recording Inputs3Source Inputs4Speaker Selection, Headphone Amp, Output, and Sub5Monitoring Section6GPI Button7Insert PathLearn How to Record Audio for Video and FilmRead MoreStyled in a red finish, the SPL DMC is a comprehensive mastering console that gives you the ability to process audio from four sets of stereo inputs, manipulating their level and polarity on a per channel basis as you hit the insert stage (i.e., your external compressors, EQs, and such). After processing audio from your external gear, you can use the DMC to monitor through four sets of speakers, a sub, and a headphone amplifier.Monitor controls are on hand for -20 dB dimming, level compensation, L/R solo, L/R polarity, and mute. All XLR terminations¡ªand there are many of them, rest assured¡ªare secured with Neutrik connectors to ensure durability. At the core of the mastering console is its formidable 120 VDC power rail, which has a palpable effect on the maximum level the circuits can handle. This translates into an extremely low signal-to-noise ratio, a large dynamic range, and much in the way of headroom. Indeed, you can push this system quite hard and loud before noticing distortion.Recording InputsFour sets of stereo inputs sit at the right of the panel. At the input, prerecording stage, you can flip the polarity of any input source, sum them to mono, adjust the recording gain, and use the input trim knobs (left and right) to either lower or drive the input to your inserts. The separation of input trims allows you to adjust for any perceived stereo imbalances.These four input-pairs can be assigned to your DAC, a tape machine, or whatever media device you use for mastering. Pressing any active input button a second time lets you instantiate direct input monitoring, effectively bypassing processing at the monitoring stage, allowing you to compare the original material with the processed path without affecting the recording stage.Source InputsFollowing the recording input path are four sets of stereo source inputs; these can be monitored, but not processed. You can place an external reference source (your DAW’s return, a tape machine, a record player, a CD player, etc.). Pressing the source button for a set of inputs will allow you to listen to them.Speaker Selection, Headphone Amp, Output, and SubYou’ll find four speaker outputs for selecting among your various monitors. Three of these (A, B, and C) are stereo, while the fourth (D) is mono. Below these are the on/off buttons for your headphone amplifier and your sub. To link a sub to any speaker button, press and hold both the sub button and the applicable speaker button until they blink. Once connected, you only need to use the speaker buttons to maneuver between differnt sets of monitors or monitor-sub combinations. Please note, this sub output is full range, so you’ll need external bass management hardware to manage the frequencies of this output. The headphone amplifier output can be set to mute your speakers and subwoofer when engaged. To do this, you only need to press and hold the HP Out button until its LED flashes.Monitoring SectionThe monitoring section offers a large knob, Monitoring Level, to control the level of the signal in your room. Mono and mute buttons are on hand, as is a -20 dB dim switch, a ¡À10 dB monitor level offset for loudness compensation, solo L or solo R channels, and polarity switching for both the left and right signals. This setup lets you compare your source material with the processed result, compensating for level differences in a variety of ways: through the direct input path, with inserts bypassed or engaged, or from the source input. An auto-bypass switch is on hand to streamline the level-compensation processing.GPI ButtonA General Purpose Interface button has been offered to use as a switch for a talkback mic or to activate a recording indicator (a red light, for example). Its signal path is discrete and does not affect audio.Insert PathThe insert path provided is for connection to external mastering gear such as compressors, EQs, and stereo processors. It offers balanced female XLR plugs. It cannot switch the order of your chosen outboard gear; it is not a mastering patch bay in this respect, and will need to be paired with an external device capable of switching.In the BoxSPL DMC Mastering Console (Red)Power CordLimited 2-Year WarrantyUser Manual3.0 MBTable of ContentsDescriptionRecording InputsSource InputsSpeaker Selection, Headphone Amp, Output, and SubMonitoring SectionGPI ButtonInsert PathSPL DMC SpecsInputsMaximum Input Level+32.5 dBuImpedance20 Kilohms, BalancedCommon Mode Rejection-82 dBu (at 0 dBu, Input and Source)OutputsMaximum Output Level+32.5 dBuOutput Impedance<600 Ohms (balanced)Noise-98.4 dBu (Output at 24 dBu, Unweighted, Insert Active) -101.6 dBu (Output?at 24 dBu, A-weighted, Insert Active) -92.2 dBu (Output?at 24 dBu, CCIR, Insert Active) -101.4 dBu (Output?at 24 dBu, Unweighted) -103.9 dBu (Output?at 24 dBu, A-Weighted) -94.9 dBu (Output?at 24 dBu, CCIR)THD + N>112 dB (Recording Output at 24 dBu, Insert Active) >108 dB (Speaker Output at 24 dBu)BandwidthTransmission Bandwidth (10 Hz to 200 kHz, Speaker Output) 10 Hz: -0.12 dB 100 kHz: -0.3 dB 200 kHz: -1.2 dB Transmission Bandwidth (10 Hz to 200 kHz, Recording Output, Insert Active) 10 Hz: -0.12 dB 100 kHz: -0.6 dB 200 kHz: -2.3 dBGeneralPower Consumption0.22 A, 230 VAC / 50 Hz, 35 W, 53 VA 0.44 A, 115 VAC / 60 Hz, 35 W, 53 VAFuses230 V / 50 Hz: 1 A 115 V / 60 Hz: 2 ADimensions19 x 5.2 x 13.4″ / 48.2 x 13.2 x 34.0 cm (3 RU)Weight23.4 lb / 10.6 kgSPL DMC
Contact UNCUCO WhatsApp: +8615989288128
Email:service@uncuco.com
