

To be honest, there are still many limitations to working as a recording studio at home.
Let me briefly introduce a few precautions. Take a look and see which conditions you can operate at home. Just pick up what you can do and do it.
- There should be no parallel surfaces inside the house
Let’s not talk about how regular recording studios are made. They have all kinds of keel and wall construction since the rough house. It’s definitely not realistic for us to operate like this now.
The simplest way is that if you want to do a recording studio, sound insulation must be done. The most cost-effective method is to use different shaped sound-absorbing surfaces, such as diffusion panels or sound-absorbing materials, on the two opposite walls. This wall is made of egg cotton, while the opposite wall is made of square cotton or the like.
Of course, if you still have money, you can use sound-absorbing panels, and then add a keel between the sound-absorbing panel and the wall to make the sound-absorbing panel protrude.
For the ceiling, stick diffusion boards or diffusion cotton on it. It can ensure that the four walls, as well as the ceiling and floor, are not parallel. - Do not have an angle less than 90 degrees inside the house
It’s between walls, it should be made into an obtuse angle, and the corner of the wall is a high-risk area for standing waves. You can place another sound-absorbing panel at the corner of the wall. Alternatively, in order to save money, one can set up a low-frequency trap. - Sound absorption and insulation
There’s no need to talk about sound absorption and insulation. You have to make sure that the sound you record is as dry as possible, so there should be sound-absorbing materials inside the house; Then you have to ensure that the sound outside the window doesn’t come in, so you need to have sound insulation.
The sound insulation material is like this. Of course, there are many materials to choose from, but the best way to achieve sound insulation effect is to change the medium of sound propagation. As long as there is a change in the medium of sound transmission, it can be almost halved for sound. For example, when sound propagates through the air and then enters walls, it weakens significantly; If you come out of the wall at this time and enter the air again, it will decay by half; If you add some sound-absorbing cotton or sound-absorbing felt, it will attenuate by half again. Once it reaches your ears through the air, there won’t be much left. So the best way to achieve sound insulation is to add layers. On your walls, try to add various different things as much as possible to naturally achieve sound insulation.
Let’s talk about sound absorption again. Sound absorption means that any material will reflect sound when it hits it. So when you sing in the room and your voice hits the wall, it will reflect back and be picked up by your microphone. Your voice will then have room reverberation, which is obviously not the effect you want. I recommend two methods to you:

Firstly, the entire house is covered with sound-absorbing panels, which are made of wood with many holes.
Then you can add a keel between this sound-absorbing panel and the wall, as well as sound-absorbing felt and rock wool. Remember, don’t make the walls parallel. In certain areas, such as the wall in front of the microphone, add some diffusion boards. Seal the window tightly. Attach sound-absorbing panels to the door and seal the gaps with soundproof strips; Attach diffusion boards to the ceiling; Lay a carpet on the ground; The corners of the wall can either be made into obtuse angles with sound-absorbing panels or covered with low-frequency traps. Got it. This plan can almost be said to be the best solution for you to transform it into a recording studio on the basis of already being renovated. —Secondly, be sure to stick a diffusion board on the wall in front of your microphone. For the remaining walls, according to the actual situation, install diffusion boards in different places. The low-frequency trap in the corner of the wall is indispensable. If possible, we still need to add carpets, seal the gaps with soundproof strips for doors, and find a way to seal the windows. What about this plan? It saves money and is easy to operate. If you have money today, stick one here, and if you have money tomorrow, stick one there.
By the way, equipment placement:
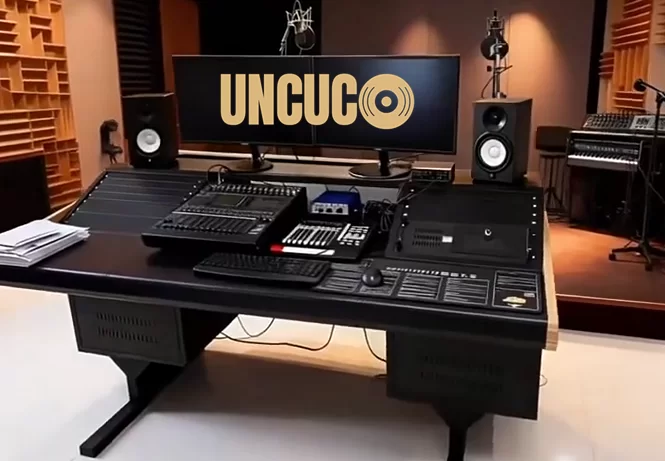
Many people spend a lot of time tinkering with acoustics, but overlook the importance of studio recording desk. A good recording studio desk should not only be stable and load-bearing, but also consider shock absorption and wiring.

This professional recording studio desk I recently used has a shock-absorbing design at the bottom, which can reduce the vibration noise transmitted from the desktop to the microphone, and all the cables can be hidden to avoid noise interference. The desktop can also adjust the angle for easy viewing of spectra and screens. If you have already put your mind into acoustics, don’t save it on the table – after all, all the devices are placed on it, which is the “foundation” of your recording workflow.
Finally, remember, remember, remember, remember.
No, I need to, whole, whole, house, all, paste, up, suction, sound, cotton.
Regarding sound-absorbing cotton, it can indeed absorb a lot of sound, but the low frequency in the sound is a long wave, which is not easily attenuated. Therefore, it will hit the sound-absorbing cotton, and if it can’t absorb it all, it will reflect back; But high frequencies are short waves, so they can be absorbed by sound-absorbing cotton, so all the reflected back are low frequencies. If you sing in this room, the final result will be a muffled sound.


