

Want your mix to wrap around the listener like a custom-made soundscape? It’s not just about pushing sounds left or right. It’s about meticulously crafting a full, rich stereo image that immerses them in a living, breathing world of sound.
In this guide, you’ll learn how to master the art of stereo imaging: how to place sounds with intention, how to use width-enhancing tools without destroying mono compatibility, and how to build the depth, height, and width that blends your mix seamlessly.
What is Stereo Imaging in Music Production?
Stereo imaging refers to the perceived spatial location of sound sources within a track. In essence, it is the “room” your track lives in. Some rooms sound small and dry, while others feel expansive and reverberant.
Each instrument’s place in that room is defined by its panning position, frequency response, and overall volume. The size of the room is determined by the amount of reverb or delay on each track, helping our ears judge how close each instrument is to the room’s “walls.”
However, music exists in a three-dimensional space (or four-dimensional if you count time), meaning multiple factors combine to shape a track’s stereo image.
Width
Width is the perceived distance between sounds coming from your left and right speakers. This is the easiest dimension to manipulate—it’s controlled by the pan knob on each track. It represents the left-to-right boundaries of your mix.
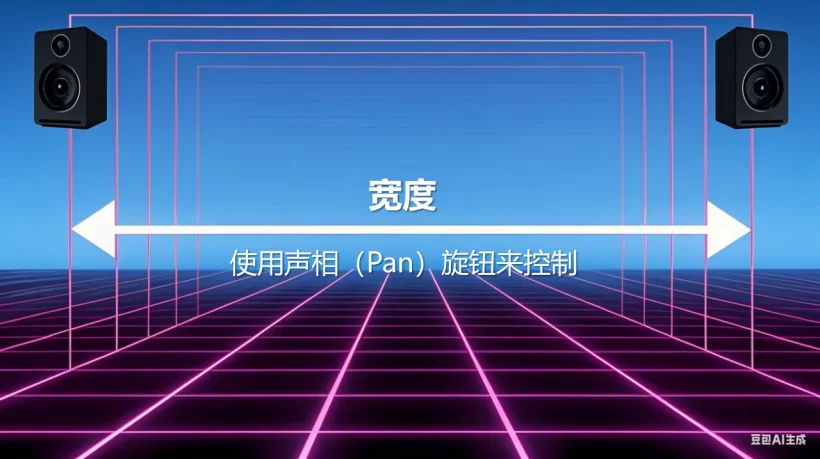
Figure 1: A diagram illustrating the “Width” parameter. (Image credit: Compiled from the original author’s diagram)
Depth
Depth is the perceived distance between the listener and the mix’s “back wall.” It’s controlled by volume levels, reverb, and other time-based effects. (A “back wall” is a metaphorical concept in mixing; it represents the perceived position of a sound source far away from the listener. If a sound feels far from our ears, the mix has high depth, and vice versa.)

Figure 2: A diagram illustrating the “Depth” parameter. (Image credit: Compiled from the original author’s diagram)
Height
Height refers to the perceived distance from the very bottom to the very top of the sonic spectrum. In a mix, it symbolizes the “floor” and the “ceiling.” Low-frequency sounds tend to feel like they are near the floor, while high-frequency sounds seem closer to the ceiling.

Figure 3: A diagram illustrating the “Height” parameter. (Image credit: Compiled from the original author’s diagram)
Envisioning Your Track’s Spatial Arrangement
A well-balanced stereo image across all dimensions makes a track feel wide and full within the overall sound field, covering every direction from low to high, front to back, and left to right.
When shaping a song’s stereo image, try to visualize each instrument’s position in a 3D space:
- Stereo instruments might stretch from the far left to the far right of the room, while a mono instrument will sit neatly in the center.
- Low-frequency instruments will be closer to the “floor,” while high-frequency instruments are closer to the “ceiling.”
- A dry track with no reverb sounds like it is at the front of the room, whereas a percussive instrument with heavy reverb will sit at the back. (The “front” and “back” of the room are relative to the listener’s distance from the sound source; closer to us means “front.”)

Figure 4: The stereo field expands forward, backward, left, and right. Spatial thinking is essential when conceptualizing the soundstage positions of elements in your track. (Image credit: Original author)
David Gibson illustrates this concept brilliantly in his book The Art of Mixing, even if the audio and visual references are a bit dated. By imagining unique mixes for various styles, I came to understand the relationships between each instrument and how to position them within the stereo image.
Tools and Techniques for Crafting a Wide Stereo Image
Now that you understand the principles of stereo imaging, let’s explore some tools and techniques that can make your mix sound wider, more balanced, and immersive.
Panning Your Mix
Panning is the most powerful tool for shaping your stereo image. It allows you to position instrument sounds horizontally, effectively deciding the extent of your mix’s left and right boundaries and the distance of each instrument from those boundaries.
Traditionally, the kick drum, snare drum, bass, and lead vocal tracks are panned dead center because they are the focal points of a mix:
- The kick and snare provide the song’s groove, making it critical to keep them centered.
- Because of how our ears perceive sound, we struggle to detect the direction of low frequencies, so bass-heavy tracks are typically left in the center.
- Additionally, the lead vocal is the most crucial element in a mix and must be placed front and center to capture the listener’s attention.
Once the center of your mix is anchored, the rest of the stereo field becomes your creative playground. Generally, it’s best to pan low-frequency instruments (like kick and bass) near the center, while higher-frequency instruments (like guitars, keyboards, and drum overhead mics) are panned outward to the sides.
A common exception is the drum kit. Treating a drum kit as a single stereo instrument rather than multiple isolated tracks can be easier. For example, the kick and snare are panned center, while the hi-hat and tom-toms are often panned to opposite sides.
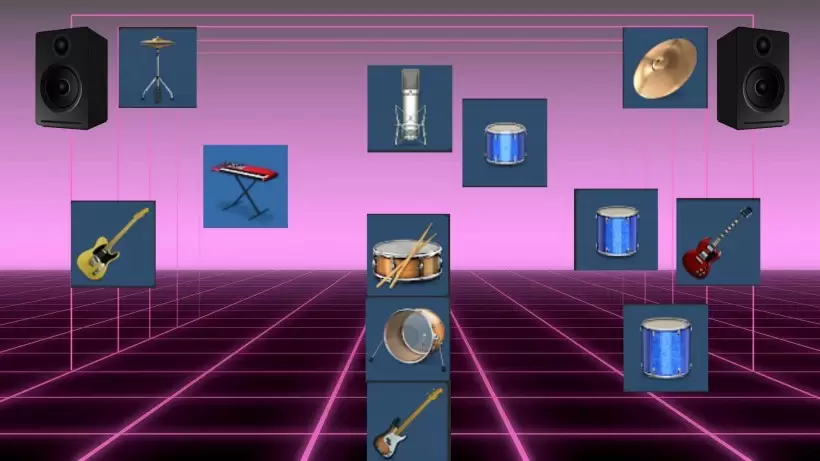
Figure 5: Reference soundstage positions (horizontal and vertical dimensions) for different instruments. (Image credit: Original author)
A pan knob has countless positions, but sometimes fewer choices produce better results. This is the concept of “LCR Panning”—placing sound elements strictly in the Left, Center, or Right channels to maximize contrast and stereo width. With LCR panning, you set an instrument’s pan to left (-100), center (0), or right (100) only. This gives instruments ample space and helps create a wide, expansive mix.
Many engineers adopt a modified LCR panning approach. They pan the most important tracks to the center or sides of the mix, and then scatter the secondary instruments across the stereo field to increase a sense of separation. This method is particularly useful when dealing with busy, dense tracks.
Choosing the Correct Panning Perspective
One factor to consider when panning instruments is which perspective to adopt. There are generally three choices:
- Performer’s Perspective: Pan instruments based on their position on stage during a live performance, assuming the viewpoint of a musician. This is commonly used when panning a drum kit to place the hi-hat and tom-toms. With this method, if a drummer uses a right-handed kit, the hi-hat is panned to the left.
- Audience Perspective: Pan instruments based on their actual performance position on stage, as if you were sitting in the audience watching a show. With this method, the hi-hat is panned to the right.
- Creative Choice: The third option is to place instruments however you wish, without being constrained by stage layout.
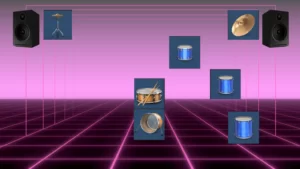
Figure 6: Panning from the performer’s perspective. The kick and snare are centered, the three toms pan gradually right from high to low pitch, and the hi-hat and crash cymbals are placed at the extreme left and right. (Image credit: Original author)
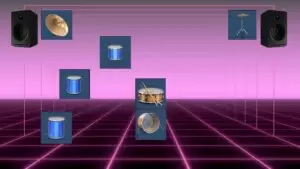
Figure 7: Panning from the audience perspective, which is the mirror image of the performer’s perspective. (Image credit: Original author)
Why You Should Mix in Mono (Especially When Setting Panning)
Here’s one more crucial tip about panning: as counterintuitive as it may sound, it’s often best to monitor and set your initial pan positions in mono. One of the hardest parts of dialing in a wide stereo image is resolving frequency balance issues. Mixing in mono helps balance frequencies and avoid masking.
You obviously can’t hear instruments move across the stereo field when panning in mono, but the track’s changes are still discernible. Each instrument’s pan position affects the overall tonal quality and balance of the mix.
Remember, if it sounds good in mono, it will sound great in stereo. Now that you’ve mastered the fundamentals of shaping a stereo field, let’s check out some techniques for creating an even wider, more immersive mix.
Using the Haas Effect to Widen Your Mix
Here is a quick and easy method to make your tracks sound wider: duplicate a track and hard-pan the copies hard left and hard right. Of course, playing the exact same signal through the left and right speakers is essentially mono. But by applying a time-based process like a delay to one of the tracks, you can leverage a psychoacoustic phenomenon that tricks the listener’s brain into perceiving two distinct signals, making the track sound noticeably wider. This is known as the Haas Effect, or precedence effect.
A definitive way to widen a mix’s stereo width is to use a stereo enhancement plugin, like the GROW module in Mastering The Mix’s ANIMATE. This module leverages the precedence effect to effortlessly increase the width of selected frequencies. Best of all, GROW can be applied dynamically, enhancing only specific signals. For example, you can use its filters to focus on a particular frequency range. This allows you to boost the high-end width of your mix without affecting low-end content, maintaining clarity and avoiding muddiness. Alternatively, you can adjust the threshold control so that only the loudest transient peaks are enhanced, creating a rhythmic pumping effect that’s perfect for synth stabs and lead lines.
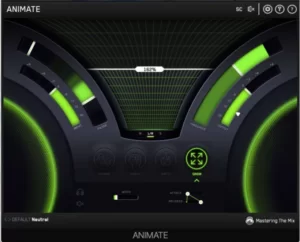
Figure 8: Use the GROW module to dynamically enhance your track’s stereo width by focusing on specific frequency ranges. (Image credit: Mastering The Mix)
This technique can cause phase issues, however. Therefore, it’s important to keep a third version of the track you’re processing panned to the center (and lowered in volume) to help maintain mono compatibility. Before exporting your final mix, use a visual inspection tool like Mastering The Mix’s LEVELS to check for phase problems.
Using Microshifting for Subtle Width
For an even more dramatic stereo widening effect, use a pitch shifter to detune each track by a few cents. The tonal difference should be just enough to grab the listener’s ear without creating dissonance.
Another option is to add a chorus effect to both tracks simultaneously. A chorus combines delay and pitch variation to make one sound feel like multiple instruments playing together. Add just enough chorus to create separation between the tracks—using too much can make a mix sound like it’s underwater.
Doubletracking: The Most Natural Stereo Widening Technique
You won’t always have the opportunity to double-track a performance, but when live double tracking is possible, this technique nearly always delivers superb separation and a wide stereo image. Doubletracking means recording a second, identical performance and layering it over the original, typically with each take hard-panned left and right.
Techniques like the Haas effect and microshifting manipulate time to differentiate a copied recording from the original. Doubletracking, however, uses a second performance to capture more inherent differences, creating significantly greater separation. Naturally, you should still strive to make the re-recorded second track as close to the original as possible. You’ll inevitably capture slightly different timing, intonation, and pitch, which helps create a more distinct sense of separation between the original and doubled track. After all, the part still needs to be rhythmically and melodically accurate.
If live doubletracking isn’t possible, dedicated plugins like Waves Doubler, Abbey Road Plugins, or Reel ADT (Artificial Double Tracking) can help simulate the effect.

Figure 9: The Waves Reel ADT plugin can simulate a tape-delay-based vocal doubling effect. (Image credit: Waves Audio)
The Final Word on Stereo Imaging
Creating a wide and immersive stereo image isn’t just about panning instruments; it’s about building a three-dimensional space where every element has room to breathe. Using techniques like LCR panning, the Haas effect, microshifting, and doubletracking can bring clarity, depth, and energy to your mixes.
Don’t forget to check for mono compatibility and use tools like reverb, EQ, and stereo imaging plugins with intentionality. When everything sits perfectly, a well-balanced stereo field doesn’t just sound beautiful—it feels comfortable and draws the listener deep into your music, from the very first note to the final fade-out.
Experiment, trust your ears, and make your mixes come alive in a full-dimensional soundscape.