


Welcome to a deep dive into one of the most crucial concepts in audio production: the mix bus. Whether you’re just starting your mixing journey or have been in the trenches for years, understanding how it works—and how to process it—can dramatically impact your overall sound. Think of the mix bus as the final checkpoint every channel passes through before leaving your mixing session. By applying subtle processing like gentle compression, delicate EQ moves, and tasteful saturation, you can add a layer of “sonic glue” that makes your music sound cohesive and unified.
In this comprehensive guide, we’ll first define what a mix bus actually is and how it differs from your master bus. Then, we’ll walk through setting it up in various DAWs. After covering the basics, we’ll explore essential processing techniques—from EQ and compression to saturation and advanced routing tricks like parallel processing.
We’ll also highlight common pitfalls that even seasoned mixers fall into, share best practices for a polished, balanced mix, and recommend some go-to plugins. By the end of this article, you’ll move beyond a basic understanding and gain a deeper insight into how to effectively use mix bus processing in your own projects.
This guide is designed to be both approachable and in-depth. Beginners will grasp the fundamentals, while intermediate and advanced users will discover practical tips on sophisticated routing and complex processing chains.
Let’s get started.
1. What is a Mix Bus?
In your DAW, a mix bus is a conceptual—and usually physical—signal path where multiple audio signals are summed and processed together. If each track in your mix is an individual passenger, the mix bus is the transit bus they all board before reaching the main output or final destination. In practice, it’s typically a stereo auxiliary channel or group channel that collects all the sound from your session.
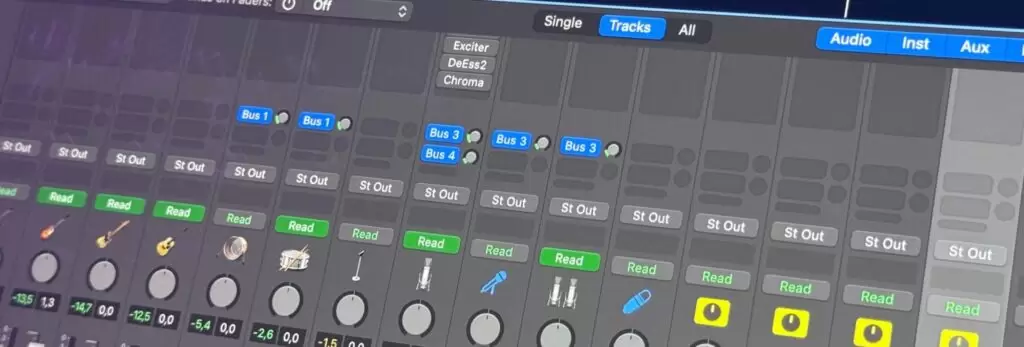
Figure 1: A Mix Bus in Logic Pro. (Image Source: Dídac, MasteringBox)
We use a mix bus, sometimes called the “stereo bus” or “2-bus,” to apply consistent processing—like EQ, compression, or saturation—to all tracks simultaneously. Imagine making subtle EQ tweaks across a dozen different vocal and instrument tracks individually. Instead, with an EQ on your mix bus, you can shape the entire song’s frequency range at once. The same goes for compression: by gently balancing the entire mix’s dynamics, you help the song sound more unified.
Why the Mix Bus Matters
Using a mix bus significantly streamlines your workflow. Instead of copying the same plugin settings across multiple individual tracks, you can make adjustments in one central place. Beyond saving CPU resources, the creative and technical benefits are massive. By introducing a unified sonic character and controlling overall dynamics in a coherent way, mix bus processing helps individual tracks “gel” together.
Efficiency and Cohesion
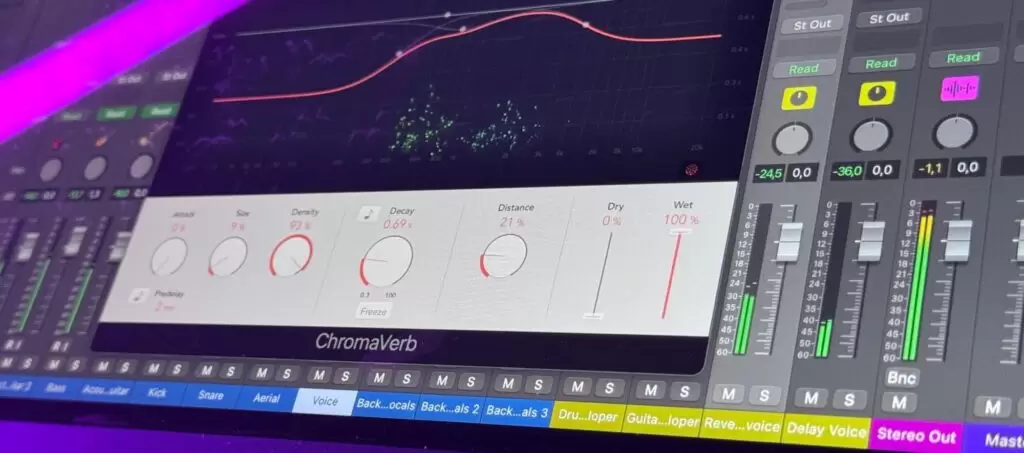
Figure 2: Applying effects, like reverb, directly on the mix bus. (Image Source: Dídac, MasteringBox)
When you apply EQ, a compressor, reverb, or other effects across your entire stereo mix, you are shaping the overall sound in real-time. This approach yields more cohesive results, acting as a unifying thread that ties all individual instruments, vocals, and elements together. Many mixers say that correctly using a mix bus can establish up to 80% of a mix’s “vibe” before you even begin fine-tuning individual tracks.
Typical Buses vs. Subgroup Buses
It’s crucial to distinguish the mix bus from subgroup buses or aux sends used for effects like reverb and delay. A subgroup bus might collect only drums or only vocals, allowing you to process them as a submix. In many setups, the mix bus is the final bus before your audio leaves the mixing session. While terminology can overlap, the core concept is that the mix bus is the final summing point for the entire track before mastering.
Common Variations
Some engineers prefer setting up multiple mix buses, each for a different part of the mix—for instance, one for drums and bass, another for guitars and keys, and a third for vocals—then routing these all to a final master mix bus. Others use a single stereo bus to handle everything. The choice comes down to personal style, musical genre, and the level of control you need over each group. Both techniques are perfectly valid when executed carefully.
2. What’s the Difference Between a Mix Bus and a Master Bus?
People often use the terms “mix bus” and “master bus” interchangeably, as if they are the same thing. In many DAWs, the master channel or stereo output technically does function as the mix bus. However, understanding their conceptual differences is incredibly helpful.
Think of the master bus as the final output channel you use to export or bounce your track. It’s typically where mastering-related tasks occur, like final limiting to hit loudness targets, dithering, or last-minute stereo enhancement. In contrast, the mix bus is the bus you use during the mixing process. You might add gentle compression or EQ there to shape the overall sound of your mix well before it even reaches the master fader.
Mixing vs. Mastering
In the mixing stage, the primary goal is to blend individual tracks together with balance and cohesion. The key to mix bus processing is gluing these tracks together in a subtle way while preserving their individual character. On the other hand, master bus processing is usually tied to mastering tasks: maximizing loudness, final broad-spectrum EQ adjustments, and other finishing touches. In many workflows, the mix bus and master bus might be the same channel; but in professional settings, they are often separate. This lets you perform cohesive “mix glue” operations on one bus and then export the result into a distinct mastering stage.
Independent Control
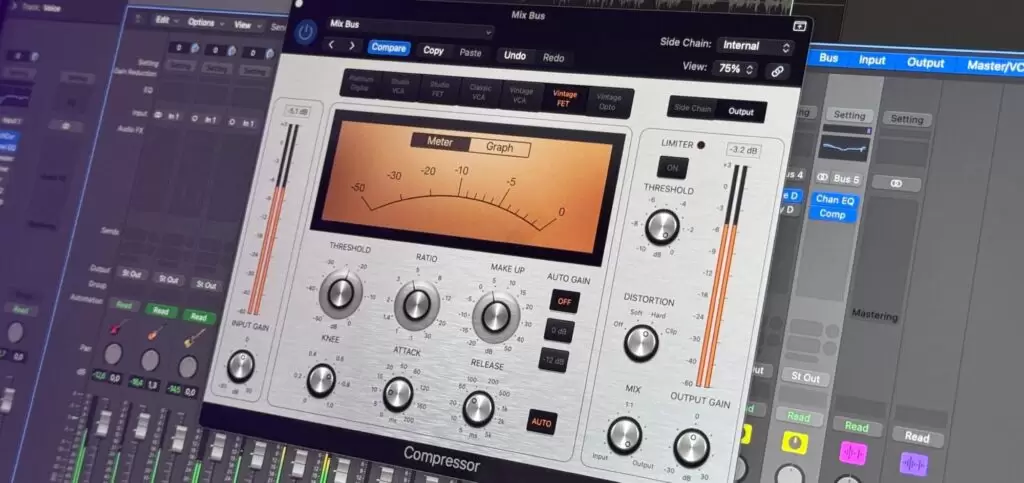
Figure 3: Using a compressor on the mix bus. (Image Source: Dídac, MasteringBox)
One of the greatest advantages of a separate mix bus is the extra layer of control and flexibility it provides. By placing all your mix-shaping tools—like a bus compressor and EQ—on a dedicated mix bus, you free up the master bus for reference comparison. For example, you can send a reference track audio directly to the master bus (bypassing the mix bus), allowing you to compare your unprocessed mix with a professional track without any bus coloration. This workflow trick allows for more accurate A/B comparisons.
Peak Headroom Management
Since you typically maintain some peak headroom on your mix bus, the master bus is often the place for the final level boost—if needed, through a limiter or final processing stage. A typical goal is to have your mix hovering around -6 dBFS at the mix bus stage to ensure plenty of space for subsequent mastering. If you rely on a single master channel for everything, you simply need to carefully manage gain levels to avoid digital clipping.
In short, the mix bus is used to enhance musical cohesion during mixing, while the master bus is the final step for completing a track. They can be the same physical channel in a DAW, but keeping them separate often makes your workflow more flexible and clear.
3. How to Set Up a Mix Bus
It’s easy to assume any stereo output channel is a “mix bus” by default. While that’s often true, many audio engineers prefer setting up an explicit mix bus for creative and operational advantages. Let’s walk through the general steps and then briefly touch on specifics for a few popular DAWs.
When you set up a dedicated mix bus, all tracks (or groups) send their signal to it, and the bus then feeds your main output. This allows you to place any mix-level processing on that bus, keeping the master channel free for reference tracks, metering plugins, or a final limiter.
General Steps
-
- Create a Stereo Auxiliary or Group Channel: Label it “Mix Bus” or any name you prefer.
- Assign All Tracks (or Submixes) to This Bus: Go through each channel’s output routing and change it from “Stereo Out” (or “Master Bus”) to your new “Mix Bus.”
- Route the Mix Bus to the Master Bus: Now that your new mix bus receives the signal, it needs to go somewhere—typically the main master output.
- Insert Plugins on the Mix Bus: You can now place your EQ, compressor, saturator, or other effects on this dedicated channel. Any processing here will affect the entire mix.
- Set to “Solo Safe” (If Needed): In some DAWs, you may need to set the bus to “Solo Safe” so it doesn’t mute when you solo an individual track.
Specific DAW Examples
-
- Pro Tools:
-
- Create a stereo Aux Input track and label it “Mix Bus.”
- Assign its input to an available stereo bus path (e.g., “Bus 1-2”).
- Route the output of all individual tracks or sub-groups to that same bus.
- Set the output of the Aux track to your main interface output or Master Fader.
-
- Logic Pro:
-
- Use a Summing Stack to collect all tracks into a “Mix Bus” aux channel, or manually send all tracks to a new bus.
- Name the aux channel “Mix Bus” and ensure its output is the default Stereo Output (or your Master Fader).
-
- Ableton Live:
-
- Group all tracks into a Group Track and rename it “Mix Bus,” or create a dedicated Audio Track set to receive audio from all other tracks.
- Then, send this new Group Track or Audio Track to the “Master” channel.
-
- Pro Tools:
In other DAWs like Cubase, Studio One, and REAPER, the procedure is conceptually identical. Once all signals are routed correctly, your entire mix passes through the mix bus processing, giving you a powerful, convenient point to shape the overall tone and dynamics.
4. Basic Mix Bus Processing
With that setup out of the way, let’s dive into the processing itself. Basic mix bus processing is about shaping the entire stereo signal with moves that are both subtle and effective. While specifics vary by style, genre, and personal preference, several core processes are relied upon by countless engineers.
The Core Tools
1. Equalization (EQ)
One of the most common effects added to a mix bus is a broad-stroke EQ. You might use a low-shelf filter to gently boost or cut the low end, or a high-shelf to add air and brightness across the mix. The key word here is subtlety—small changes have a massive impact when applied to the whole mix. Typical adjustments might include:
-
- A slight cut in the low-mid region (around 200-350 Hz) to increase clarity.
- A gentle high-shelf boost above 10 kHz for “air.”
- A mild high-pass filter set around 20-30 Hz to remove inaudible sub-bass rumble.
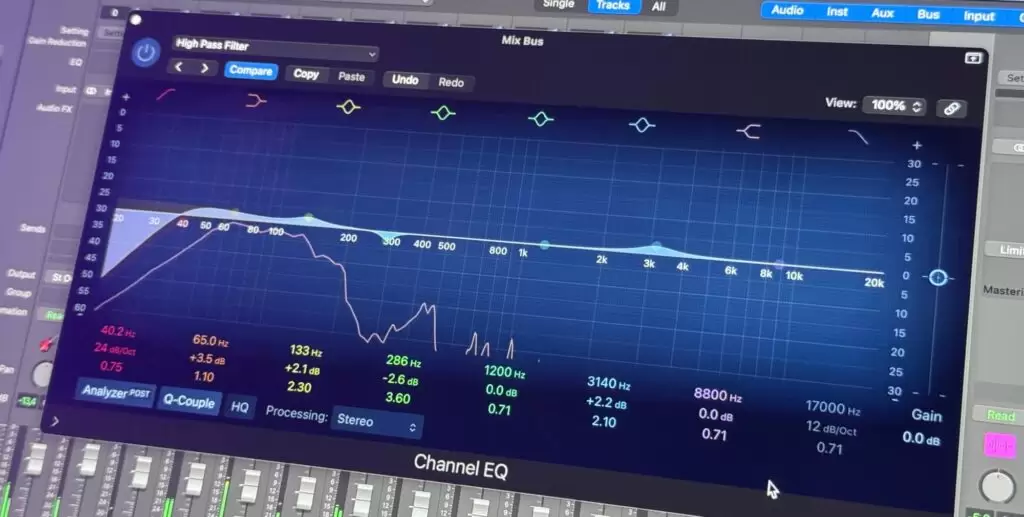
Figure 4: Applying an Equalizer on the mix bus. (Image Source: Dídac, MasteringBox)
Be cautious with precise, surgical EQ adjustments on the mix bus. If you find yourself needing large, narrow cuts, it’s often better to address the problematic frequency in the individual source track.
2. Compression
Many engineers love using a “glue compressor” on the mix bus, often with a low ratio (1.5:1 to 2:1), a slow attack, and just a few decibels of gain reduction. This style of compression glues the mix together, ensuring transients are controlled just enough to make everything sound more cohesive. Whether using a classic SSL-style bus compressor or a modern digital emulation, the goal is gentle gain reduction. Over-compressing can suck the life and energy out of a mix.
3. Saturation
Subtle saturation can inject a wonderful sense of warmth across an entire mix. By introducing harmonics, a saturator can glue elements together in a pleasant, almost imperceptible way. Tape emulation is incredibly popular here—some add a touch of gentle tape saturation to smooth out transients and give the mix an analog feel. Similarly, tube or console emulations can contribute a lovely sense of warmth or color on the mix bus.
Order of Processing
You might wonder whether to place EQ before compression or vice versa. In many cases:
-
- EQ first to set an overall tonal profile before the signal hits the compressor.
- Compressor next to enhance glue and control transients.
- Saturator last to add final harmonic magic and color.
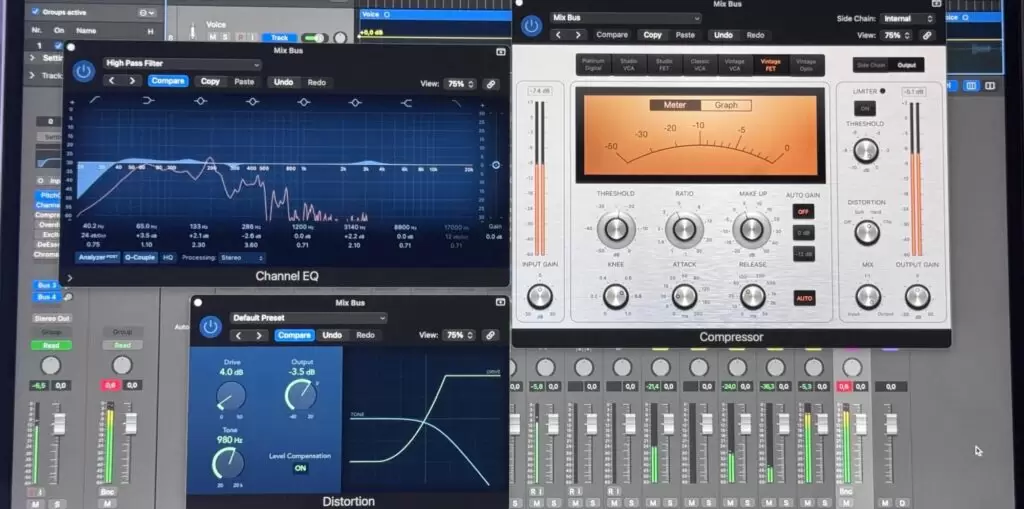
Figure 5: A mix bus processing chain with different effects (EQ, Compression, Saturation). (Image Source: Dídac, MasteringBox)
(Translator’s Note: Subtle distortion can function as a saturation effect.)
But there’s no hard and fast rule. Some mixers prefer compressing first, so the compressor reacts to the original frequency balance. Try both orders and see what works best for your material.
Use Your Ears
Always be on guard against over-processing when using these basic tools. Bypass each plugin individually to ensure it’s truly improving the sound and not just making it louder. Try to volume-match your plugin’s output with the bypassed signal—otherwise, the louder version will almost always fool you into thinking it sounds “better.” The most effective mix bus adjustments are often felt more than they are explicitly heard.
5. Advanced Mix Bus Processing and Routing
Once you’ve mastered the basics, let’s explore some more sophisticated techniques for those seeking deeper control. Advanced mix bus processing often involves parallel audio paths, multiple stages of compression, or complex routing schemes that let you treat different groups of tracks in unique ways.
Parallel Compression
A more involved technique is applying a parallel compression chain to the entire mix. Instead of just one compressor on the mix bus, you create a secondary bus, heavily compress it, and blend it with the original. This adds density and perceived loudness without squashing your precious transients. Many compressors feature a “Mix” or “Blend” knob, making parallel processing easy: simply apply heavy compression and then adjust the wet/dry mix to around 50% or until it sounds right.
Benefits of Parallel Compression:
-
- Preserves transients and original dynamics in the dry path.
- Adds body, thickness, and sustain from the heavily compressed path.
- Allows you to process the parallel signal with different EQ or effects than the main path.
Multi-Bus Workflows
Some engineers split a mix across two or more main buses, each receiving different elements. For instance, one might carry drums, bass, and other rhythmic elements, while another contains guitars, keys, and vocals. Each bus can then have different compression or processing before they are all merged. This prevents, for example, overly loud drums from pumping and ducking the vocals and other instruments, or vice versa.
Mid/Side (M/S) Processing
Another advanced method is mid/side processing. It works by separating a stereo audio signal into a “Mid” component (everything panned center) and a “Side” component (stereo width information). Using a Mid/Side EQ or compressor, you could, for example, gently compress the mid channel to control vocals and bass, while leaving the sides untouched for a wide, open sound. Or, you might add a high-frequency boost only to the side channel to increase air and spaciousness without brightening the center-panned elements.
Automation on the Mix Bus
An often-overlooked but highly effective trick is automating the volume or other effects on your mix bus over time. For example, you could automate the mix bus volume up by 0.5 dB for the final chorus to give it extra impact, or perform subtle EQ boosts to the high-end as a song progresses. Because the mix bus affects everything, minor adjustments can have a massive emotional impact on the listener, making your mix feel more dynamic and alive.

Figure 6: Applying volume automation on the mix bus. (Image Source: Dídac, MasteringBox)
6. Common Mistakes in Mix Bus Processing
Even experienced engineers sometimes trip up with mix bus processing. Let’s highlight some common pitfalls and how to avoid them.
1. Over-Compression
One of the most frequent traps is overdoing the compressor on your mix bus until the life and dynamics of the track are lost. Fast attack times, high ratios, and significant gain reduction can strangle the life out of a mix, leaving it flat and lifeless. If your meters show more than a few dB of compression, ask yourself if the effect is truly beneficial. Far more often, a lighter touch sounds more open and natural.
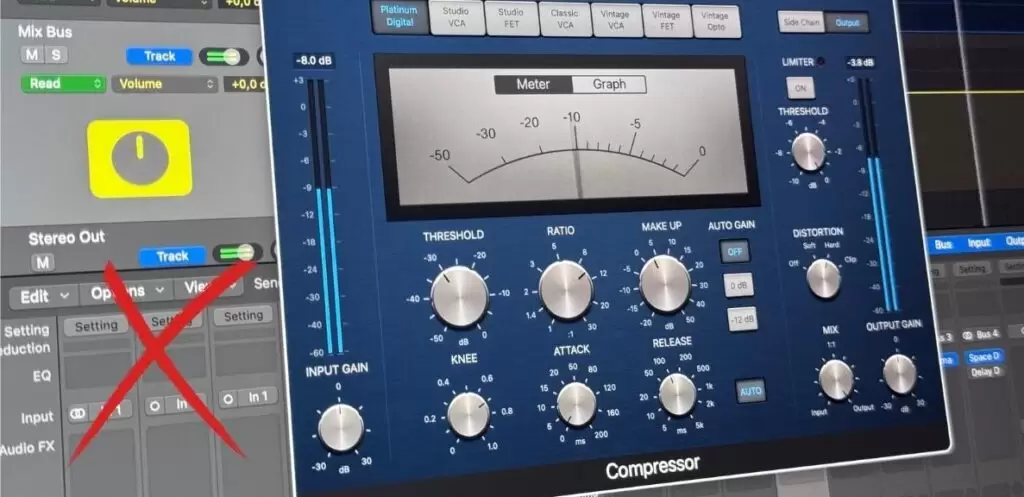
Figure 7: An example of over-compression on the mix bus. (Image Source: Dídac, MasteringBox)
2. Excessive EQ Adjustments
Large EQ boosts or cuts can quickly throw off the balance of your entire mix. Remember, every decibel of EQ adjustment on the mix bus affects every single instrument. If the low-mids sound muddy, investigate the source tracks (likely a guitar or bass) instead of globally scooping them out. The mix bus is best for broad, gentle shaping.
3. Not Leaving Enough Headroom
Pushing your mix bus to peak near 0 dBFS can lead to digital clipping or force you to use a limiter that might alter the mix’s character. A good practice is to leave around -6 dBFS of peak headroom on the mix bus. This gives a mastering engineer (even if it’s you at a later stage) the room to work effectively. If you’re constantly hitting 0 dBFS, bring your individual faders or group channels down.
4. Relying on the Mix Bus to Fix Everything
Avoid the temptation to rely on your mix bus to solve major problems, such as a boomy kick drum or harsh vocals. Those issues should be fixed at the track or sub-group level. A mix bus’s role is to provide a final coat of polish, not to fix major arrangement or recording flaws.
5. Not Level-Matching
A classic blunder is failing to match the output level before and after applying mix bus plugins. A common scenario: adding a compressor with auto make-up gain that subtly increases the overall volume, causing you to perceive it as “better” purely because it’s louder. Always attempt to bypass your entire processing chain while keeping the perceived volume equal to confirm your changes offer a genuine improvement.
6. Overusing Time-Based Effects
Slathering reverb, delay, or other time-based effects across the entire mix bus is a recipe for a muddy, washed-out sound. Unless you have a very specific creative intent—like a lo-fi or experimental vibe—it’s best to avoid these effects on the whole mix. Modulation effects can also cause phase issues and unintended shifts in the stereo image.
Ultimately, the key to avoiding these errors is critical listening, mixing at comfortable volumes, and treating bus processing as a delicate polish, not a brute-force fix.
7. Best Practices for Mix Bus Processing
It’s helpful to have a checklist of best practices to guide your decisions. These are not rigid rules but rather habits that many successful mixers follow to create cohesive, clean, and dynamic mixes.
Subtlety is Key
Think small on the mix bus. You might need only 1–2 dB of EQ boost. If using a glue compressor, just 1–3 dB of gain reduction is often ideal. A touch of saturation, not full-blown distortion, is usually enough. If you’re unsure, dial the settings back slightly and listen again.
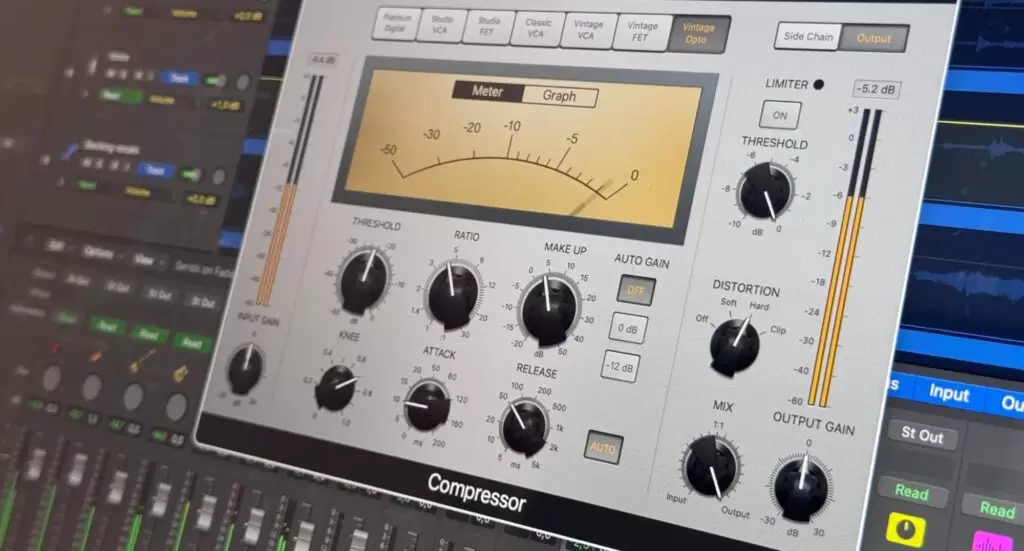
Figure 8: Using a compressor for subtle, gentle gain reduction. (Image Source: Dídac, MasteringBox)
When to Start Processing
Some engineers start processing the mix bus early on, “mixing into” the glue from the very beginning. Others prefer to add it once the static mix is nearly balanced and complete. Both approaches can work, but you’ll likely need to adjust individual track levels when you engage or disengage the mix bus chain. If you start with it from the beginning, all your mixing decisions will be made around it.
Guard Your Headroom
Constantly monitor your meters to ensure the bus isn’t clipping. Even if your DAW uses 32-bit float processing, external hardware, certain plugin chains, or analog emulations can still distort at high levels. Leave plenty of room for subsequent mastering stages.
Leverage Reference Tracks
Route a reference track directly to your master output for easy A/B comparison. This ensures your bus processing doesn’t affect the reference. Match their volumes for a fair comparison and listen for differences in tonal balance, stereo width, and dynamic range.
Be Bold, but Do it Consciously
Sometimes a more aggressive bus processing sound is the goal—for example, certain EDM genres, rock music, or anything that relies on strong compression as an effect. If it’s a creative choice, go for it, but make sure it’s intentional. A carefully crafted “pumping” effect can add excitement, while an over-compressed, lifeless track is just that—lifeless. There’s a big difference.
Use Metering Tools
Place a metering plugin on your mix bus to monitor peak levels, LUFS, or RMS. This helps you maintain a consistent output level and avoid accidental overloading. Some mixers use a multi-analyzer to see the frequency spectrum in real-time, ensuring they aren’t over-boosting or neglecting any frequency bands.
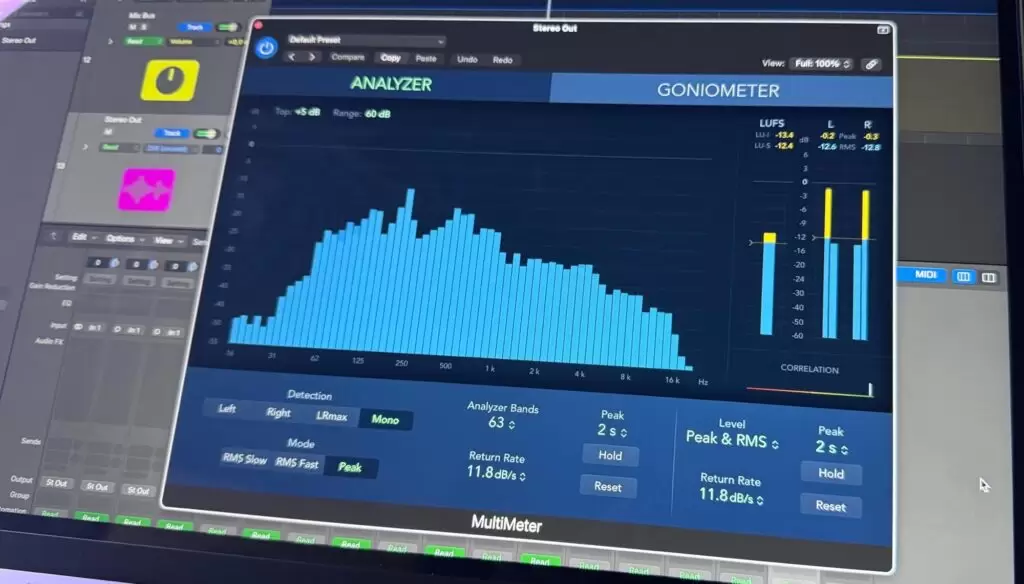
Figure 9: Adding a metering plugin on the mix bus. (Image Source: Dídac, MasteringBox)
Check Your Mix in Mono
Summing your mix to mono is a time-tested technique. If your bus processing includes a stereo widener, mid/side EQ, or any adjustments to the stereo field, checking in mono ensures your mix elements still hold up. If everything collapses together or certain instruments disappear, you might need to fine-tune those stereo processing effects.
At the end of the day, these best practices come down to balancing the art and science of mixing. Keep processing subtle unless you have a clear sonic goal. Always be aware of how each plugin impacts the entire song, and try to maintain objectivity—if you feel your settings might be going off course, take a break and return later with fresh ears.
8. Recommended Plugins for Mix Bus Processing
Having a shortlist of plugin recommendations can be very helpful, especially for newcomers or those looking to expand their toolkit. We can look at these by category, but always remember that your DAW’s stock plugins can be equally effective.
EQ Plugins
-
- Transparent EQs: FabFilter Pro-Q 3, stock EQs like Logic’s Channel EQ or Ableton’s EQ Eight. These are perfect for precise, clean tonal shaping.
- Analog-Modeled EQs: Pultec emulators, SSL channel strips, Neve-style EQs. These can add a desirable harmonic color and are fantastic on a mix bus.
Compressor Plugins
-
- Glue Compressors: SSL-style bus compressors or anything labeled “bus comp.” These are designed to add that classic “glue” heard on countless records.
- Transparent Compressors: Some digital compressors like TDR Kotelnikov are designed to be as “colorless” as possible. A great choice if you only want dynamic control without added tone.
- VCA-Style (like API): Known for a punchier, sometimes more aggressive sound. Ideal for rock or modern pop where you want the drums to hit with more impact.
Saturation & Color
-
- Tape Emulations: Popular tape plugins add gentle saturation that smoothly tames transients and adds harmonic richness. UAD Studer A800 or Softube Tape are classics.
- Tube & Transformer Emulations: Console plugins that introduce a subtle “vintage” or “analog” vibe.
- Dedicated Saturators: Plugins focusing purely on saturation, from gentle enhancement to more intense distortion, like Soundtoys Decapitator.
Stereo Imaging and Mid/Side Tools
-
- Stereo Width Tools: Standalone plugins like iZotope Imager that allow you to safely widen or narrow the stereo field. A touch of width can add a wonderful sense of space.
- Mid/Side EQs: As discussed, these allow for precise control over the center and side signals. For instance, boosting the highs only on the sides to add top-end air without affecting center elements like the lead vocal.
Metering & Analysis
-
- Spectrum Analyzers: Voxengo SPAN (free) or iZotope Insight provide a visual display of your frequency balance across a track.
- Loudness Meters: If you’re targeting a specific LUFS level, a meter like Youlean Loudness Meter is essential.
- Phase Correlation Meters: Used to detect phase issues between your stereo channels.
Remember, you don’t need a massive plugin library to get a great sound. Many classic mixes were done using only the stock EQ and compressor on a console. The key is knowing your tools intimately and applying them with care.
9. Conclusion
After understanding the definition of a mix bus, its distinction from the master bus, and a comprehensive exploration from basic EQ and compression to advanced parallel chains and multi-bus setups, you should have a solid grasp on how to integrate this concept into your workflow. The mix bus is all about harnessing the collective energy of all your tracks and shaping it in a cohesive, musical way.
Whether you’re chasing a clean, polished pop mix or a dynamic, gritty rock track, the mix bus offers a powerful platform for broad-strokes sonic sculpting. Remember to mind your headroom, stay vigilant of over-compression, and always trust your ears to confirm whether your processing is truly elevating the music. If you’re new to this, start experimenting with subtle bus EQ and gentle compression; if you are a seasoned pro, explore parallel bus compression, mid/side techniques, and automation that evolves throughout the song.
Remember, mix bus processing isn’t a magic “cheat code.” It will never fix fundamental mixing problems that need to be addressed at the track or subgroup level. However, when applied skillfully, it’s the tool that can elevate a good mix to a great one, providing that final layer of professional polish and consistency. Feel free to experiment with different plugins—both stock and third-party—and discover which ones spark your inspiration.
Ultimately, each song may call for a unique combination of EQ, compression, and color on its mix bus, just as each track has its own unique requirements. Don’t be afraid to experiment. The most important thing is the final result: a mix that connects with the listener both sonically and emotionally. Now, it’s your turn to fire up your DAW, set up that dedicated bus, and start crafting your signature sound.
Happy mixing!


UNCUCO S-01A Straight Type Professional Recording Studio Desk-Music Production
Price range: $1,295.00 through $1,758.00

UNCUCO S-02B Curved Type Recording Studio Desk-19 Inch Rack Workstation
Price range: $1,323.00 through $1,695.00

UNCUCO S-03C Curved Type Studio Desk | Professional Music Production Desk for Audio Console Mixer
Price range: $1,678.00 through $1,887.00