
Mid/Side (M/S) is a unique stereo technique with a long history. Just like A/B, XY, and ORTF, it’s a time-tested method widely adopted across the audio industry. However, M/S has a “secret weapon”: it uses just two microphones—a cardioid to capture the center source and a figure-8 to capture the surrounding ambience—giving you comprehensive control over the stereo field in post-production. Simultaneously, M/S processing allows you to independently treat the mid and side signals, surgically improving your sound and helping you craft a more cohesive mix. This guide dives deep into both the recording and audio processing dimensions of M/S.
Part 1: Mid/Side Stereo Recording Technique (Source: eMastered)
Mid/Side mic recording (M/S or MS) is a versatile stereo technique. Excellent audio production starts with an excellent recording, and achieving that requires managing performance, tonal accuracy, and acoustic space. Crucially, the microphones you choose and how you place them can determine your success or failure from the very start.
If you understand various stereo microphone configurations—especially Mid/Side—you gain a significant edge in the studio and more room for experimentation. Let’s cut straight to the chase and explore why M/S recording deserves a spot in your workflow.
What is Mid/Side Recording and Why Does It Matter?
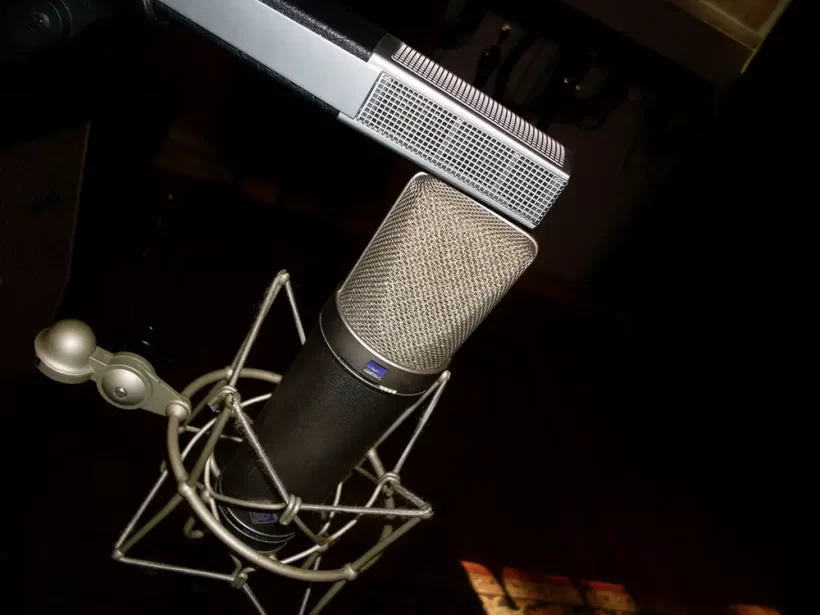
Figure 1: Typical M/S microphone configuration. The bottom Neumann U87 is set to figure-8 as the side mic; the top Sennheiser MD 441-U is set to supercardioid as the mid mic. Place the mid mic directly above or below the side mic. (Image credit: eMastered)
Mid/Side recording is a stereo technique that gives a mix engineer absolute control over the recorded audio’s stereo image—essentially, the distribution of sound between the left and right speakers. The core lies in using two mics in a specific way: the mid mic (usually cardioid) faces the source to capture direct sound, while the side mic (figure-8) is placed at a 90-degree angle to capture reflections and ambience from the left and right.
The beauty is that this flexibility comes after recording. You can freely adjust the stereo width of your tracks at any time. Additionally, the mid mic recording easily converts to a centered mono track for precision mixing, and this method boasts high phase-coherence.
In a real-world studio, time is money. The faster you capture the ideal sound, the more you save. The M/S technique’s ability to provide both mono and stereo, and blend between them, means you can spend less time tracking and more time mixing. It saves you time and money while laying a solid foundation for your project. When set up correctly with quality mics, this method delivers exceptional results.
A Brief History of Mid/Side Recording

Figure 2: Alan Blumlein (1903-1942), the electronic engineer and inventor of the M/S recording technique. (Image credit: Wikipedia)
Something doesn’t become a classic just because it’s old. It endures because it works. In 1933, nearly a century ago, Alan Blumlein—an EMI engineer celebrated for his contributions to stereo sound—discovered and patented the M/S method. He proved its value by implementing it in some of the earliest stereo recordings. Beyond music studios, M/S has become a staple mechanism in radio broadcasting and live sound production.
Mid/Side vs. XY Microphone Technique
In modern music production, stereo recording—using two mics on a single source, one for the left and one for the right channel—is standard for creating a sense of space and dynamic movement. However, splitting a sound across two channels can cause phase issues. Depending on mic distance and angle, the audio quality can differ noticeably between stereo and mono modes.
M/S vs. XY
Over the years, engineers developed specific stereo techniques to prevent phase problems. M/S is a proven utility, but the most popular is the “XY” technique. In an XY configuration, two microphones are positioned facing each other, typically one just above the other, at a 90-degree angle.
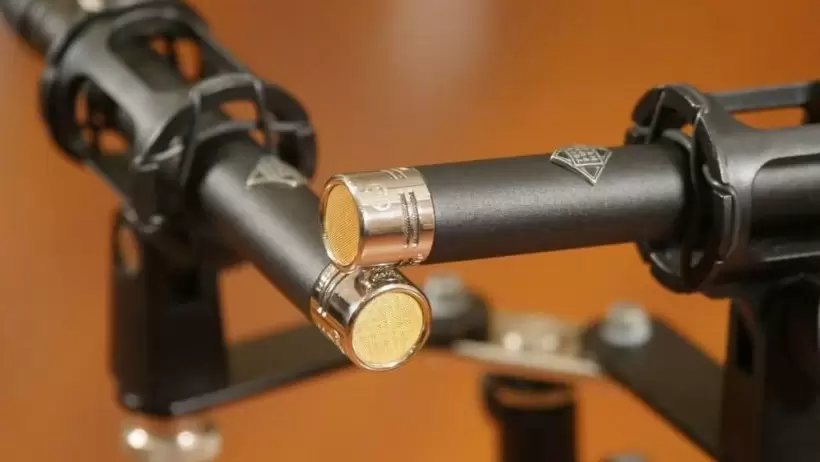
Figure 3: XY microphone configuration. Two mics are placed tightly together, typically one directly above the other, at a 90-degree angle. The mics shown are a Telefunken M60st set. (Image credit: Ash Burnett)
The key difference is that M/S is designed to capture both the mono and stereo image of a source simultaneously, whereas XY records only left and right. XY inherently lacks mono compatibility, while the M/S method gives you both. Furthermore, M/S recordings often capture more room ambience than XY, which can be an advantage or a disadvantage depending on your goal. The largest advantage M/S holds over XY is the ability to adjust stereo width after the recording.
Other stereo methods like ORTF, spaced pair (A-B), and Decca Tree each have their own characteristics, but our focus here is the M/S method.
How Mid/Side (M/S) Recording Works
The name itself reveals the setup. One mic is placed in the center (“Mid”), and a second is rotated 90 degrees to the “Side,” directly above or below the first. This layout allows one mic to capture the direct audio signal while the other captures the stereo image. It’s not a one-size-fits-all mic situation; you need two different types or configurable ones.
The “Mid” mic should use a cardioid or supercardioid pattern, picking up sound mainly from the front. The “Side” mic must use a figure-8 pattern, picking up sound from the left and right. This way, the center channel receives direct sound, and the side channel captures the room’s reflections. Each mic’s pickup area is the dead zone or “null spot” of the other, creating a centered, coherent image.
The Advantages of Mid/Side Recording
Why choose M/S over other stereo methods? While each has its own strengths, M/S is a uniquely comprehensive and reliable option. The three main advantages are flexibility, control, and mono compatibility.
1. Flexibility: Unlike XY, ORTF, and spaced pair recording, which typically require two identical microphones, M/S lets you experiment with different mics for the mid and side channels, as long as you follow the required polar patterns.
2. Control: With M/S, the stereo image depends entirely on the signal level received by the left and right sides of the figure-8 mic. You can widen or narrow the stereo effect simply by adjusting the volume of the mid or side mic after tracking. If you turn the mid channel all the way down, you get a spacious, ambient room sound; turn the side channel to zero, and you have centered mono audio. Most other stereo configurations offer nowhere near this much mixing flexibility.
3. Mono Compatibility: Mixing in mono is a brilliant way to identify phase issues and clean up a muddy mix. With an M/S setup, you can access a pure mono track simply by listening to only the “Mid” channel.
Setting Up an M/S Recording
Now that you understand the “why,” let’s get to the “how.” Here’s a step-by-step guide.
1. The Hardware
First, pick your two mics (as discussed), two reliable mic stands, cables, preamps, and input channels (stereo means two of everything). Set up your mid mic as you would for a mono recording, at an appropriate distance from the source. Next, place the side mic directly above or below the mid mic, ensuring it’s at a precise 90-degree angle, facing left and right. Configure the polar patterns correctly: cardioid for mid, figure-8 for side.
2. The Digital Side (Software)
Like any stereo setup, each mic’s signal goes to its own track. But for M/S, each channel must be matrixed and decoded in your DAW to produce true stereo. Your side mic essentially does the work of two mics, so its signal must be split into two independent channels.
You do this by duplicating the side signal on two tracks, panning one hard left and the other hard right, then inverting the phase of one of them. In this way, you produce three channels (center, left, and right) from just two microphones.
Mid/Side Recording FAQ
1. Is M/S Recording “True” Stereo?
There’s debate on this. Proponents argue that M/S is just a roundabout way of capturing the stereo field, creating a left, center, and right channel from two mics. Some purists disagree because the left and right channels are digitally created through matrixing. Regardless of the label, M/S successfully creates a stereo image from a single source and often captures more room ambience than XY.
2. How Do I Matrix and Decode an M/S Signal?
The basic operation is simple: digitally duplicate your side mic’s track and invert its phase by 180 degrees. In your DAW, create three tracks (mid mic, side mic, and phase-inverted copy of the side mic). Pan one side track hard left and the other hard right. Then, sync their volume faders so you can symmetrically widen or narrow the stereo field. If manual routing sounds complex, many M/S decoder plugins exist, like the free Voxengo MSED.
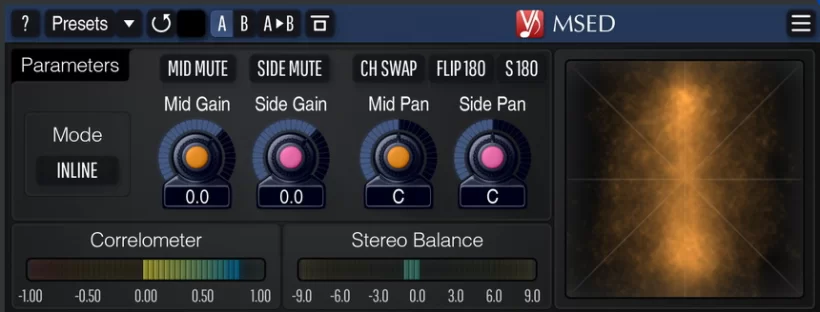
Figure 4: The MSED, a free M/S decoder plugin by Voxengo. (Image credit: Voxengo)
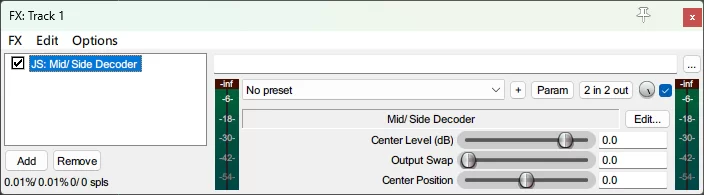
Figure 5: Some DAWs include a native M/S decoder. Pictured is REAPER’s built-in “Mid/Side Decoder.” (Image credit: Article translator)
3. What is “Double M/S”?
Double M/S expands the traditional technique by adding a third, rear-facing directional mic behind the source. This results in three mid-channels and two stereo side-channels, opening up even more possibilities for surround and immersive audio.
4. What is Mid/Side Compression?
Mid/Side compression involves compressing the mono (mid) and stereo (side) elements of a signal independently. An engineer might use this to tame a loud sound in the center of the stereo field without affecting its wider elements.
5. When Should You Use Mid/Side EQ?
Mid/Side EQ lets you adjust the frequency balance of the mid and side signals independently. Use it to clean up low-end mud in the center, add sparkle and width to the sides, or carve out space for a vocal that’s fighting with panned instruments. It is a powerful mastering tool.
In Summary: Choose Your Side
The principles of M/S recording are straightforward to grasp. The more you experiment with this and other stereo techniques, the more unique applications you’ll discover. The control that M/S configuration offers over the stereo field in mixing and mastering is a powerful tool that can make your tracks sound wider and more dynamic.
Part 2: Mid/Side Processing Technique (Source: Mastering The Mix)
Mid/Side processing is an incredibly flexible mixing and mastering technique that allows you to treat the center and sides of a stereo track separately. Used correctly, it can make your tracks sound wider, deeper, and more focused. However, the concept can be tricky to understand at first. Here’s an in-depth guide to help you master it.
What is Mid/Side Processing?
Unlike traditional processing that affects the entire L/R stereo signal, M/S processing lets you independently process the center (Mid) and the sides (Side) of a stereo channel. By splitting these signals, you can surgically shape the stereo image’s balance.
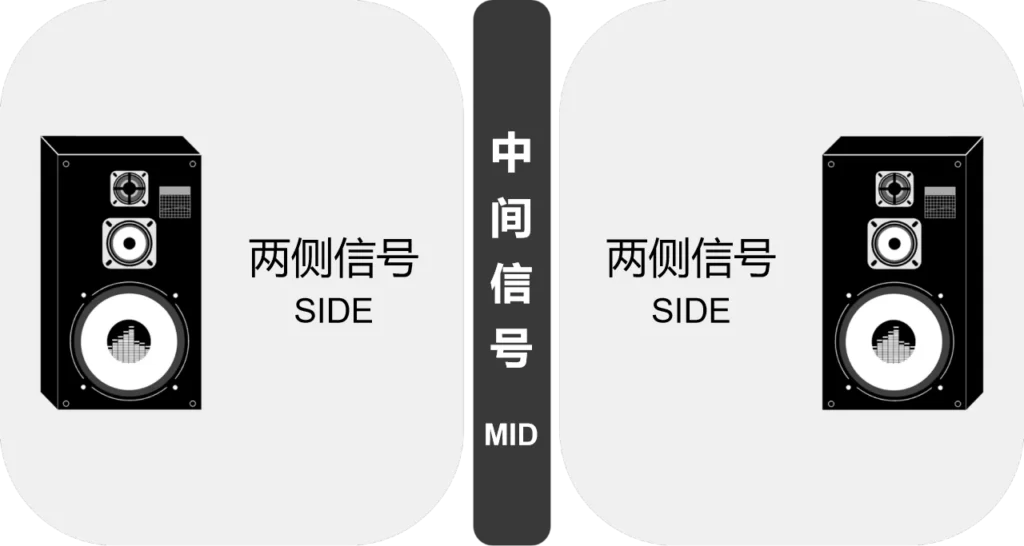
Figure 6: An illustration of Mid/Side signals. (Image credit: Mastering The Mix)
Though it sounds modern, the concept was pioneered in 1933 by Alan Blumlein. It was used widely in live broadcasting for its strong, mono-compatible center signal.
In the digital realm, an M/S plugin splits your stereo track into two parts: the Mid signal (information heard in both speakers) and the Side signal (information unique to the left and right speakers). This processing can be applied to individual tracks, instrument groups, or an entire mix bus.
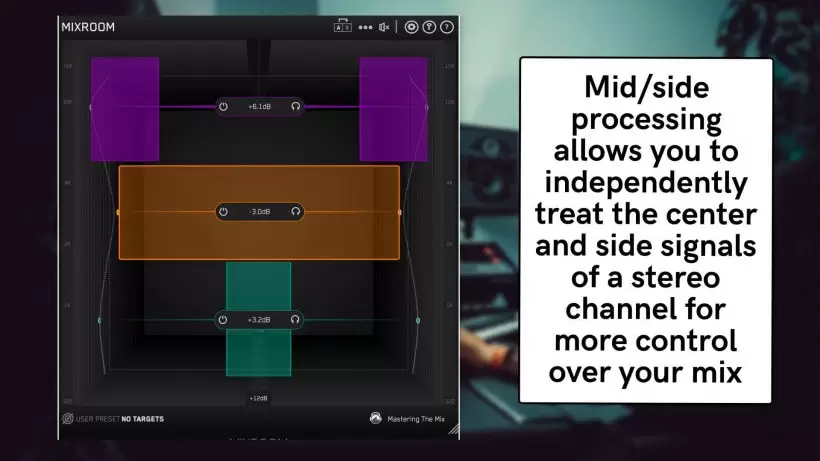
Figure 7: M/S processing allows you to adjust mid and side signals separately. Shown here is Mastering The Mix’s MIXROOM plugin, which operates like a parametric EQ mapped across both spectrum and stereo field. (Image credit: Mastering The Mix)
Why Use Mid/Side Processing in Your Mix?
Technically, M/S plugins can execute various types of signal processing:
-
- A basic M/S processor lets you adjust individual level or stereo spread.
- An M/S compressor provides dynamic control with separate ratio, attack, and release settings for the center and sides.
- Even time-based effects, like delays, can use M/S processing for incredibly spatial effects.
The most common form, though, is EQ processing. M/S EQ lets you independently adjust different frequency ranges in the center or sides. For example, you can remove mud by keeping low frequencies focused in the center or enhance perceived width by boosting high frequencies on the sides. This is also invaluable in mastering, allowing you to isolate and boost the low-end punch of a kick, the edge of a guitar, or the sizzle of cymbals without affecting the entire mix.
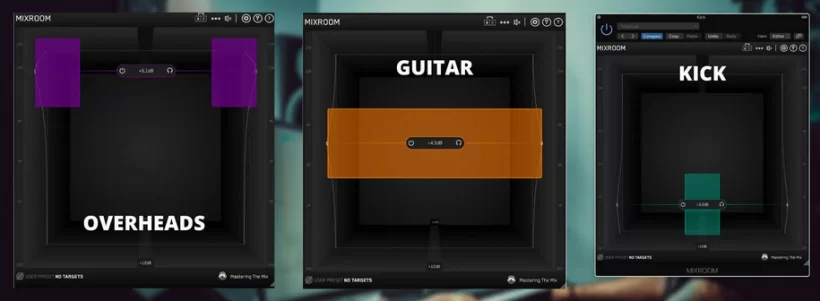
Figure 8: M/S EQ can add width, depth, and focus. Here, MIXROOM’s EQ applies different processing to instruments based on their stereo position. (Image credit: Mastering The Mix)
How to Use a Mid/Side EQ (With MIXROOM)
1. The Basics
Insert a plugin like MIXROOM on your track, bus, or group. Start by picking a genre-based preset or creating a target EQ curve from a reference mix.
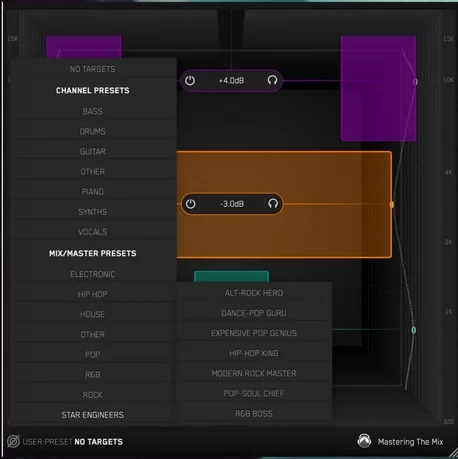
Figure 9: You can load presets tailored to specific music genres. (Image credit: Mastering The Mix)
Click “Add Smart Bands” to load EQ bands that match a target curve, giving you a visual guide on what to adjust. Always engage the level match feature for fair A/B comparisons. To shift a band’s gain to a specific stereo position, hover over its control panel to reveal the “Stereo” icon. Click the “M” to isolate the mid, or “S” for the side. You can also drag the icon left/right to blend the effect.

Figure 10: The “Stereo” button, indicated by the white arrow, controls the blend ratio between the mid and side signals. (Image credit: Mastering The Mix)
2. Processing the Low-Mids
A very common use is taming the low-mid strength to create a solid center. Create a band around 500 Hz. Adjust the Q for a wide bell, covering roughly 320 Hz up to 700 Hz. Click the “M” button. If the track feels thin, boost this band; if it’s bloated, cut it to clean up mud.
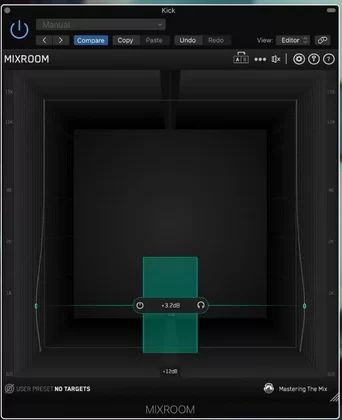
Figure 11: Focusing the low-mids into the center of the mix. (Image credit: Mastering The Mix)
3. Processing the High-End
To add air, insert MIXROOM on your mix bus. Create a new band in the high-end. Click the “S” button and the “bell” icon to turn it into a high-shelf filter. Apply a subtle boost above 10 kHz to add clarity and space to your mix. For a more dramatic effect, try cutting the mid-range from the sides.
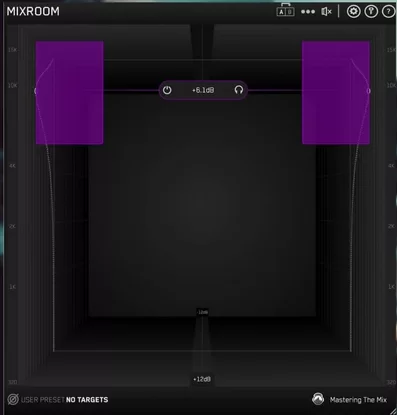
Figure 12: A gentle boost above 10kHz on the side channel adds air and space to your mix. (Image credit: Mastering The Mix)
4. Processing Individual Instruments
Use MIXROOM on single instruments. For instance, focus the low-end of drums and bass to the mono center band; add width to snares and guitars by boosting the low-mids of the mid signal and highs of the sides; push cymbals to the edges to carve out space for a centered lead vocal.
A word of caution: overuse of M/S processing can make a track sound unnatural or cause phase problems. Use gentle settings and monitor your mix with a plugin like LEVELS to check for phase correlation issues.
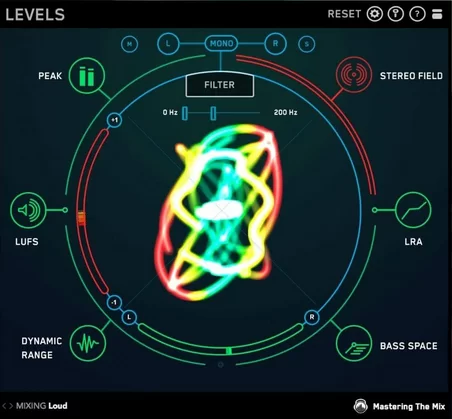
Figure 13: Use a comprehensive visual metering plugin like Mastering The Mix’s LEVELS to detect phase issues. (Image credit: Mastering The Mix)
By understanding how to use M/S processing to widen, deepen, and focus your tracks, you can elevate your mixes to a more professional and compelling level.


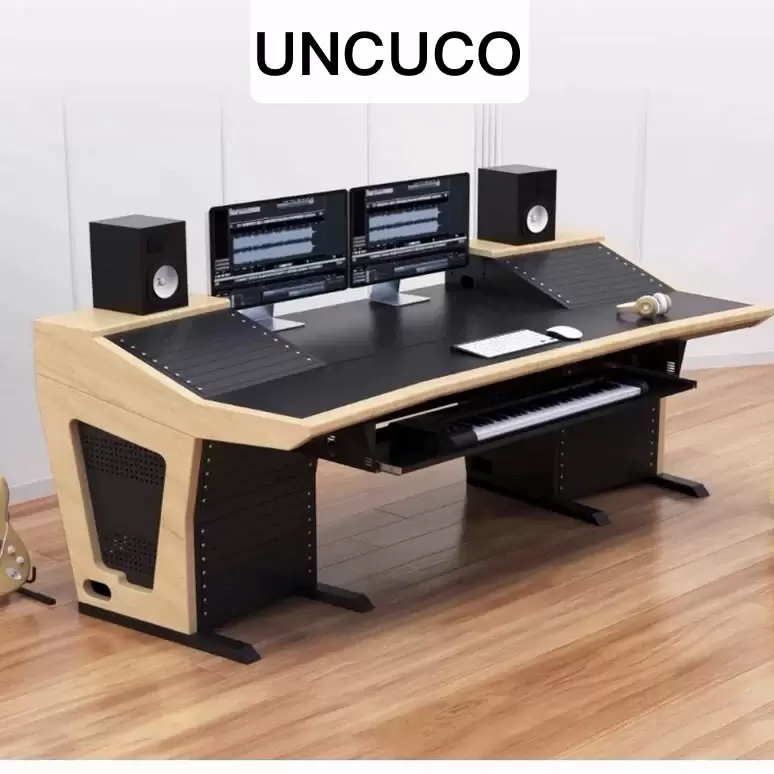
UNCUCO S-01A Straight Type Professional Recording Studio Desk-Music Production
Price range: $1,295.00 through $1,758.00- Fully Customizable: Size, Logo, Color, Lighting, Style, Finish, Casters, Special Requirements
- Free Shipping to Worldwide, No Customs Duties.
- Zero Fee Door to Door Delivery, Multiple Protection Packing.
- Upgrade Your Studio Space Right Now !


UNCUCO S-02B Curved Type Recording Studio Desk-19 Inch Rack Workstation
Price range: $1,323.00 through $1,695.00- Fully Customizable: Size, Logo, Color, Lighting, Style, Finish, Casters, Special Requirements
- Free Shipping to Worldwide, No Customs Duties.
- Zero Fee Door to Door Delivery, Multiple Protection Packing.
- Upgrade Your Studio Space Right Now !

UNCUCO S-03C Curved Type Studio Desk | Professional Music Production Desk for Audio Console Mixer
Price range: $1,678.00 through $1,887.00- Fully Customizable: Size, Logo, Color, Lighting, Style, Finish, Casters, Special Requirements
- Free Shipping to Worldwide, No Customs Duties.
- Zero Fee Door to Door Delivery, Multiple Protection Packing.
- Upgrade Your Studio Space Right Now !


UNCUCO S-04D Curved Type Recording Studio Workbench 19-Inch Rack Audio Production Mixing Desk
Price range: $1,698.00 through $1,852.00- Fully Customizable: Size, Logo, Color, Lighting, Style, Finish, Casters, Special Requirements
- Free Shipping to Worldwide, No Customs Duties.
- Zero Fee Door to Door Delivery, Multiple Protection Packing.
- Upgrade Your Studio Space Right Now !


UNCUCO S-05E Studio Mixing Desk: The Ultimate Workstation for Avid C24 & Pro Tools Workflows
$1,748.00- Fully Customizable: Size, Logo, Color, Lighting, Style, Finish, Casters, Special Requirements
- Free Shipping to Worldwide, No Customs Duties.
- Zero Fee Door to Door Delivery, Multiple Protection Packing.
- Upgrade Your Studio Space Right Now !


UNCUCO S-06F 3-Rack Studio Desk For Audio Production Console
$1,950.00- Fully Customizable: Size, Logo, Color, Lighting, Style, Finish, Casters, Special Requirements
- Free Shipping to Worldwide, No Customs Duties.
- Zero Fee Door to Door Delivery, Multiple Protection Packing.
- Upgrade Your Studio Space Right Now !


UNCUCO S-07Q Recording Studio Table Music Audio Control Operation Desk
$878.00- Fully Customizable: Size, Logo, Color, Lighting, Style, Finish, Casters, Special Requirements
- Free Shipping to Worldwide, No Customs Duties.
- Zero Fee Door to Door Delivery, Multiple Protection Packing.
- Upgrade Your Studio Space Right Now !


UNCUCO S-01A 1.6M Studio Console Desk | Professional Audio Workstation Furniture
Original price was: $1,250.00.$921.00Current price is: $921.00.- Fully Customizable: Size, Logo, Color, Lighting, Style, Finish, Casters, Special Requirements
- Free Shipping to Worldwide, No Customs Duties.
- Zero Fee Door to Door Delivery, Multiple Protection Packing.
- Upgrade Your Studio Space Right Now !


UNCUCO Custom Recording Studio Table For Audio Control Console Mixer
$982.00- Fully Customizable: Size, Logo, Color, Lighting, Style, Finish, Casters, Special Requirements
- Free Shipping to Worldwide, No Customs Duties.
- Zero Fee Door to Door Delivery, Multiple Protection Packing.
- Upgrade Your Studio Space Right Now !

