

With the rise of the audio economy and remote work, more and more people are choosing to record from home.
Recording at home, however, means dealing with environmental noise. After all, even the best techniques and equipment struggle against ever-present background sounds.
So, to help you capture cleaner recordings, I’m sharing some acoustic tips today. While they won’t match a professional studio, they can significantly reduce common recording challenges.

But before diving into these tips, let me highlight something crucial that’s often overlooked but affects everything else: your studio workstation. Many invest in great microphones and audio interfaces, only to place them on a wobbly, resonant desk. It’s like wearing premium running shoes on a sandy beach. I learned this the hard way. Moving my gear onto a professional studio desk designed for audio work made me realize how vital a stable, well-designed foundation is. It might not be glamorous, but it ensures all your other equipment can work “quietly” and “correctly.”
Finding the Right Spot
The first step to a good recording environment is choosing the right space.
Ideally, pick a quiet room with minimal noise to cut out external sounds from the start. This reduces post-processing work, as even the best noise reduction can harm audio quality.
This spot should be away from windows, well-insulated, and at least big enough for a small table (since you’ll need space for your gear).
Of course, if you have more space, that’s even better. A small room can cause strong “room resonance,” making sound muddy and unclear.
Larger rooms also allow for more acoustic treatment options. For example, your choice of flooring—laminate, tile, or concrete—can help reduce sound reflections.
A quick note on your studio table: You need a surface regardless of room size. Any studio table works for a temporary setup. But for long-term, stable, and comfortable work, a professional studio desk is a worthwhile early investment. It provides a rock-solid, weight-bearing surface for your expensive monitor speakers and mic stands (preventing noise from vibrations). Its built-in rack mounts and cable management systems turn messy cables and interfaces into an organized setup, boosting both efficiency and safety—trust me, no one wants to trip over a cable or kick a power strip.
Choosing Your Recording Equipment
01 Computer Specs
Whether using a laptop or desktop, you need sufficient power to run recording software smoothly. Here are the basic specs for using an audio interface:
· Processor: i3 8th Gen or above, i5 7th Gen or above, i7 6th Gen or above
· RAM: At least 8GB (4GB is often insufficient)
· Clock Speed: Minimum 2.0 GHz
· OS: At least Windows 7 64-bit (XP won’t work)
· CPU: Avoid models with a ‘Y,’ ‘U,’ or ‘M’ suffix (low-voltage versions can cause clicks, static, or audio dropouts).
· Note: AMD processors and Apple M1 chips may have compatibility issues.
02 Microphone Choice
Using a cardioid, supercardioid, or hypercardioid microphone helps reduce picked-up room reflections and ambient noise.
03 Choosing Recording Software
Options include Adobe Audition, etc.
04 Don’t Forget the “Foundation”: A Professional Studio Desk
We carefully select each piece of gear but often forget they need a proper, high-quality “home.” Your audio interface, MIDI keyboard, control surface, and even computer should be ergonomically organized. This is the purpose of a professional studio desk: it integrates all equipment into a layout designed for the task. You can mount your interface in the standard 19-inch rack, securely lock your mic stand to the heavy desktop to prevent swaying, and position your monitor at an optimal height. This integration minimizes potential electronic interference and physical noise from scattered setups, letting you focus on creating.https://uncuco.com/uncuco-88-key-electronic-piano-midi-keyboard-desk-music-studio-arrangement-recording-workstation.html
Dealing with Noise
Home noise comes from outside and from internal echoes and reverberation. To create a quieter space that handles room resonance, you can add sound-absorbing surfaces.
- High-Frequency Noise (sharp, piercing): Solutions below.
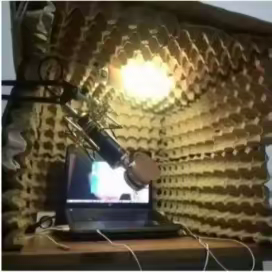
01 Cardboard + Egg Cartons
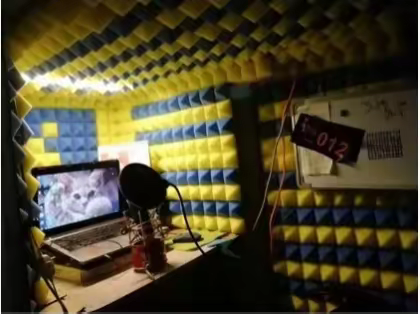
Use porous, textured materials like foam. Egg cartons glued to cardboard can create a small DIY vocal booth, though it’s not very stylish.
02 Acoustic Foam Panels
These work similarly to egg cartons but look better. Their thickness is easier to control. Panels around 4 inches thick can absorb frequencies from 200 Hz to 800 Hz or higher, depending on the sound’s angle of incidence.
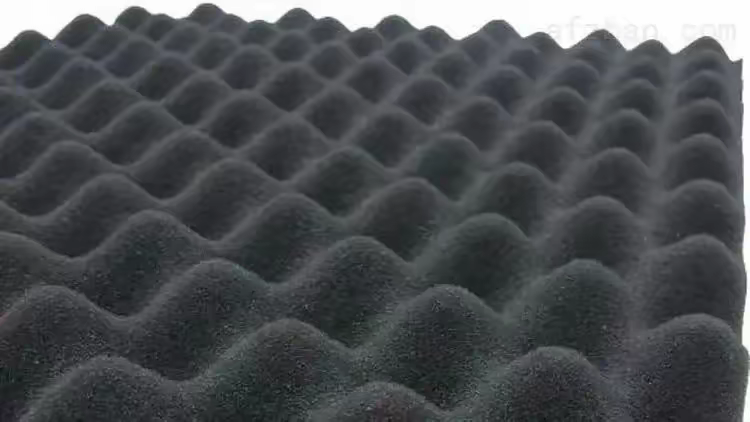
· Foam is highly flammable and requires fire retardant treatment.
03 Spacing
If space allows, leave some gaps between foam panels. Covering every surface can make the sound too “dead.” Some natural reflection adds a sense of space and liveliness.
04 Other Materials
Sleeping bags, moving blankets, rugs, thick curtains, and glass fiber insulation covered with thin cotton or burlap can also help absorb sound and reduce reflections.

- Low-Frequency Noise (less noticeable, boomy, muddy): This muddies recordings, often below 300 Hz. Use bass traps.
01 Friction Pipe Trap
Create a 2-foot diameter, 8-foot tall canvas tube, fill it with fiberglass insulation, and hang it 3.5 inches from a room corner to help absorb around 80 Hz.
02 Wood Panel Absorption
Wood panels on walls can absorb some bass content, reducing low frequencies in your recordings.

The Desk’s Acoustic Role: We treat walls and corners but often forget the desk itself is a large reflective and resonant surface. Keyboard taps, mouse movements, and speaker vibrations travel through it. A well-designed studio desk features structures (like thick tops and steel-reinforced frames) with excellent dampening and anti-resonance properties. Some models offer floating or isolated desktop sections, physically separating monitor vibration from the microphone area. This acts like a built-in acoustic solution on your desk, effectively reducing low-end rumble from structural transmission.
UNCUCO Final Word
Everyone’s home environment is different, so adjust these methods as needed—add or remove treatments.
You can also add soft furnishings like carpets, heavy curtains, or a couch to absorb sound and cut down on reverb.
Finally, my thoughts on the “desk”: You can follow all the tips above and create an effective recording nook with egg cartons and blankets. But when you move from “making it work” to “serious creating,” you’ll find that a professional studio desk is the first upgrade that maximizes the value of all your other investments (good mics, monitors, interfaces). It provides more than a surface—it’s a stable, efficient, tidy foundation that contributes to cleaner sound. It makes “recording at home” feel more professional, reliable, and enjoyable.
I hope these practical tips, combined with my experience, help you. Start by choosing your corner and build your sound castle step by step!


_edit_29850739313673.jpg")

