
Description: Learn how to record professional-quality vocals in even the most humble spaces. This definitive guide covers DIY room treatment, mic placement, pop shield hacks, noise reduction, and DAW settings to get you a release-ready sound with just a microphone and a computer.
How to Record Pro Vocals in a Home Studio: A Complete Guide for Bedroom Producers
Besides a live drum kit, vocals are one of the hardest musical elements to capture with a truly professional polish—especially when you don’t have a professional studio at your disposal. Yet, they remain absolutely critical in modern music production.
Whether sung, whispered, spoken, shouted, or rapped, a compelling vocal melody can elevate a decent track into something truly exceptional. Our ears are naturally most sensitive to the human voice, and in virtually every genre and style of music, it’s usually the main event. This makes the recording process absolutely crucial.
Sure, we can use all sorts of tricks to add depth, impact, or sparkle to a vocal recording later on, but at the end of the day, getting the recording itself right has probably already won 90% of the battle.
In the past, recording singers and MCs was exclusively the domain of major commercial studios, equipped with purpose-built live rooms, a vast array of high-end microphones, and racks of premium hardware processors. But today, thanks to the availability of affordable recording gear, the raw power of modern computers, and a little DIY ingenuity, it’s entirely possible to lay down release-ready tracks from the comfort of your own home.
In this guide, we’ll walk you through exactly how to transform your bedroom or spare room into a capable vocal studio. We’ll teach you how to tame excessively echoey spaces, how to build your own pop shield, and how to minimize background noise. Naturally, we’ll also cover the best practices for setting up your mic, audio interface, and DAW. What’s more, we’ll dive into how to manage monitoring during a session to coax the best possible performance out of your singer. So, without further ado, let’s get started!
1. Setting Up Your Room Before Recording
Before you even hit record, there are a few things you can do to ensure you’re capturing the cleanest possible signal into your computer. This involves making some adjustments to your room, considering your microphone placement, and minimizing any extraneous noise that could bleed into your recording.
To give yourself maximum flexibility when processing vocals later, you need to get the cleanest possible sound into the mic. The single most critical step is to hang a blanket on the wall behind the singer (pushpins are often the quickest way to secure it). This dampens sound reflections that would otherwise bounce right back into the sensitive front of the microphone’s capsule.
The goal here is to minimize that harsh, metallic-sounding room reverb in your recording. As a general rule, it’s best to record vocals as dry as possible and then add your own reverb using plugins during the mixing stage.
If possible, choose a room that’s already carpeted; if not, at least place a thick rug in the area where you and the mic are positioned. Besides floors, walls, and ceilings reflecting sound, windows are also major culprits. Make sure to draw the curtains, close the blinds, or at minimum, hang a blanket over any glass surfaces in your studio.
Essentially, any flat, hard surface is your enemy, as it reflects sound. So, if your storage closet is full of spare blankets, towels, or odd bits of bedding, pull them out and cover as many wall surfaces, desks, and table tops as you can. If your resources are limited, concentrate your efforts on the area of the room directly behind the singer’s head.
If none of the above tames the reflections in your recording room, you can try draping a large blanket over the singer’s head and the microphone. This has the added bonus of preventing ceiling reflections from bouncing down into the mic. Just make absolutely sure the blanket isn’t touching the mic or the stand, or any movement will be picked up in the recording.
2. Microphone Placement
Your microphone should be positioned far from any walls and away from your workstation, as sound can reflect off these surfaces and be picked up in your recording.
On the other hand, you also don’t want to place the mic in the exact center of the room, where standing waves can cause major interference. (A standing wave is a stable pattern of sound formed in an enclosed space when reflections between two parallel surfaces interfere with the original source. This causes some spots in the room to sound significantly louder, while others sound much quieter or practically dead.) Instead, aim to place the mic slightly closer to two walls, with the singer facing into the room and the majority of the blankets (or whatever else you’re using) pinned to the wall behind their head.
The ideal spot might be the one furthest from your desk and windows, but that’s not always practical, so simply focus on minimizing reflections.
The singer’s distance from the microphone depends entirely on the genre and the specific character of their voice. For example, a screaming metal vocalist might need to be at least 1 foot (approx. 30.5 cm) away, while a soft-voiced folk singer might be 4–6 inches (approx. 10-15 cm) from the mic. These are just rough guidelines, though, so at the start of every session, it’s wise to record a few short test takes to nail down the perfect distance for the song you’re tracking.
During a take, the singer should try to keep their head as still as possible and their feet firmly planted. It’s also advisable to have them sing slightly off-axis (not directly into the center of the capsule). Most microphones, depending on their polar pattern, are hyper-sensitive to sounds directly on-axis, so any movements toward or away from the mic are amplified in this centered position.
Experienced singers will often instinctively lean back slightly for particularly powerful, high notes and move closer for quieter, more intimate passages. But unless your singer is a true master of their technique, it’s best for them to remain as stationary as possible.
3. Pop Shield Tips
A pop shield is essential for taming the heavy plosive blasts (expelled air from the mouth) created by words starting with ‘b’ and ‘p’. This will save you a lot of grief during the editing and mixing stages.
Pop shields aren’t particularly expensive, but if your budget is truly tight, there’s the classic DIY solution: stretch an old pair of nylon tights over a frame made from a wire coat hanger. If you don’t have tights, a kitchen sieve can also do the trick in a pinch.
One more phenomenon to be aware of is the proximity effect. If the singer’s mouth is just a few inches from the mic, the low frequencies can become drastically accentuated. So, if you find your singer has a habit of creeping closer during a performance, try adjusting the distance between the pop shield and the mic so they simply can’t get near enough to trigger the effect.
4. Noise Reduction Hacks
Another option is to invest in an add-on isolation screen that mounts to your mic stand and creates a shield around the back half of the microphone, such as the Aston Halo, Reflexion Filter, or Primacoustic VoxGuard. These screens enclose the space behind the mic, helping to block room reflections from entering at that angle.
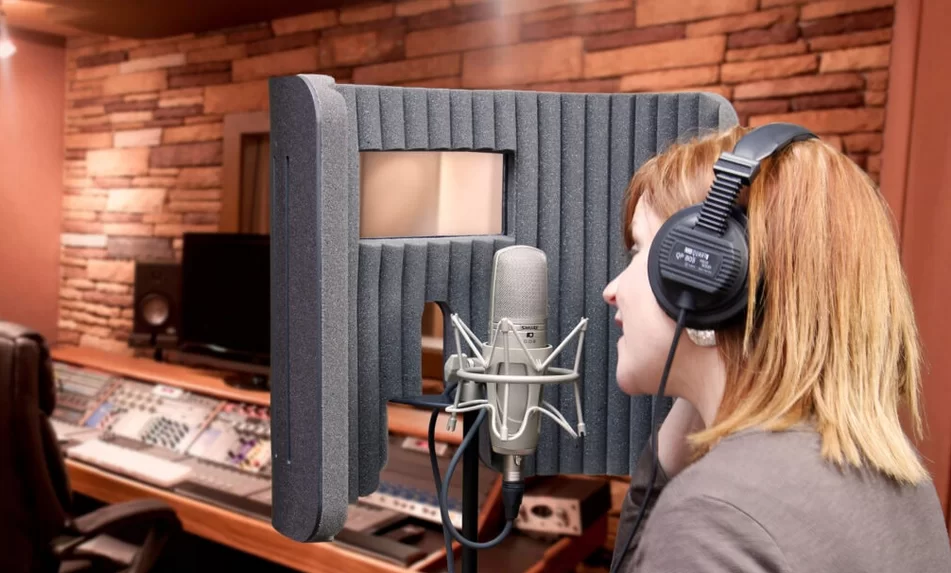
Figure 1: The Primacoustic VoxGuard isolation shield, shown mounted on a mic stand, envelops the rear space of the microphone. (Image source: Primacoustic)
However, these devices can be a bit pricey. As an alternative, you can hang a heavy blanket from the ceiling or move a tall piece of furniture (ideally also draped with a blanket) behind the mic. This will help you capture a drier sound.
Finally, minimize any extraneous noise that could ruin a great take. For instance, if your computer’s cooling fan is loud, consider purchasing some extension cables so you can move the computer itself outside the room or, at the very least, as far away from the microphone as possible.
Some more obvious pointers: shut all windows and doors, and switch off any electrical appliances you’re not using. If you live with others who might accidentally interrupt, hang a “Recording in Progress” sign on the door!
5. On the Software Side…
Your computer setup is critical for recording great vocals. First and foremost, buy the best audio interface you can afford, as this directly affects the overall quality of your recorded signal. The two main things to consider are the quality of the preamps and whether you’ll need phantom power (note that all condenser mics require phantom power or an internal battery, while dynamic and most ribbon mics do not).
For this tutorial, we used the Focusrite Saffire audio interface. The main reasons are its high-quality, low-noise preamps, which are vital for getting a clean signal into your computer, and it also provides the +48V phantom power required by our Blue Microphones Bluebird condenser mic. There are, of course, many other excellent interfaces on the market, so it’s worth shopping around to find the best fit for your needs and budget.

Figure 2: The Focusrite Saffire series audio interface, which features high-quality preamps. The model pictured is the Saffire PRO 14. (Image source: Focusrite)
In the past, engineers often used hardware compressors on the way in to ensure the vocal signal wouldn’t clip. However, 24-bit recording has largely made this practice redundant for that specific purpose. This is because 24-bit depth offers a vast dynamic range that can fully capture both the quietest and loudest signals with plenty of headroom. Remember, you don’t need to push the loudest signals to the top of your interface’s input meter; in fact, aiming for peaks around -12 dBFS is a common and safe practice for 24-bit recording.
However, if your system can only capture at 16-bit depth, you’ll need to set your levels much more carefully, as very quiet recordings risk being obscured by the noise floor and hiss.
In that case, you should have your signal peaking around -6 dBFS. This gives you a reasonable safety margin should the singer accidentally lean in and belt a louder note than expected, preventing clipping. Then, if your track has some particularly quiet moments, you might try recording those sections separately and adjusting the input gain accordingly.
Next, you need to consider your DAW’s buffer size setting, as an incorrect setting can lead to latency issues. A small buffer size means the delay between the singer’s voice and what they hear in their headphones will be minimal; however, if set too low, your playback and vocal recording may suffer from pops and clicks. A large buffer size should eliminate any playback glitches, but the delay between singing and hearing it in the monitors can become disorienting. The goal, therefore, is to set the buffer size as low as it can go without introducing any glitches.
6. Testing, Testing…
Before we go, there are a few more points to keep in mind.
First, you need to craft a good monitor mix where the vocals can be clearly heard over the backing track, but not so loud that they overpower all the other instruments—otherwise, pitching accurately becomes nearly impossible.
Furthermore, for songs where the vocals enter before any melodic instrument, you should drop in a piano note just before that section begins to give a starting pitch. And if there are sections where the instrumentation entirely drops out, you may need to construct a temporary guide track so the singer can hear the rhythm and key of the song—this can simply be removed once the vocal is recorded.
In professional studios, you’ll often see singers wearing headphones with one ear on and the other off. The benefit here is that the singer can hear the mix and their previously recorded vocals in one ear, while the other ear hears their own voice naturally. Typically, they will be using closed-back headphones, as these effectively prevent the backing track from bleeding out and being picked up by the vocal mic.
Above all else, the most important thing is the performance. If forgoing ultimate sound quality for an alternative method yields a better performance, then absolutely ignore all the advice given above.
At the end of the day, all these rules are made to be broken. For instance, listen to Christina Aguilera’s “Beautiful.” At around the 3 minute 45 second mark, you can actually hear the drum track bleeding from her headphones, but the producer decided to keep this take because her vocal performance was simply flawless. Bono has famously recorded vocals live with the entire band in the same room to feed off a more energetic performance, and Master D, former frontman of Asian Dub Foundation, was known to monitor his takes through speakers to achieve his passionately charged delivery.


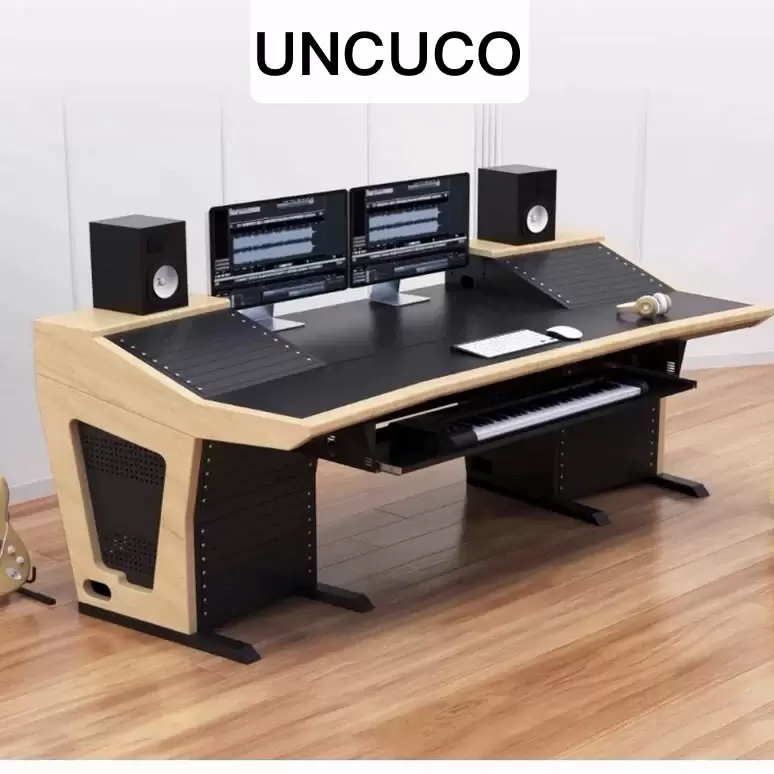
UNCUCO S-01A Straight Type Professional Recording Studio Desk-Music Production
Price range: $1,295.00 through $1,758.00- Fully Customizable: Size, Logo, Color, Lighting, Style, Finish, Casters, Special Requirements
- Free Shipping to Worldwide, No Customs Duties.
- Zero Fee Door to Door Delivery, Multiple Protection Packing.
- Upgrade Your Studio Space Right Now !


UNCUCO S-02B Curved Type Recording Studio Desk-19 Inch Rack Workstation
Price range: $1,323.00 through $1,695.00- Fully Customizable: Size, Logo, Color, Lighting, Style, Finish, Casters, Special Requirements
- Free Shipping to Worldwide, No Customs Duties.
- Zero Fee Door to Door Delivery, Multiple Protection Packing.
- Upgrade Your Studio Space Right Now !

UNCUCO S-03C Curved Type Studio Desk | Professional Music Production Desk for Audio Console Mixer
Price range: $1,678.00 through $1,887.00- Fully Customizable: Size, Logo, Color, Lighting, Style, Finish, Casters, Special Requirements
- Free Shipping to Worldwide, No Customs Duties.
- Zero Fee Door to Door Delivery, Multiple Protection Packing.
- Upgrade Your Studio Space Right Now !


UNCUCO S-04D Curved Type Recording Studio Workbench 19-Inch Rack Audio Production Mixing Desk
Price range: $1,698.00 through $1,852.00- Fully Customizable: Size, Logo, Color, Lighting, Style, Finish, Casters, Special Requirements
- Free Shipping to Worldwide, No Customs Duties.
- Zero Fee Door to Door Delivery, Multiple Protection Packing.
- Upgrade Your Studio Space Right Now !


UNCUCO S-05E Studio Mixing Desk: The Ultimate Workstation for Avid C24 & Pro Tools Workflows
$1,748.00- Fully Customizable: Size, Logo, Color, Lighting, Style, Finish, Casters, Special Requirements
- Free Shipping to Worldwide, No Customs Duties.
- Zero Fee Door to Door Delivery, Multiple Protection Packing.
- Upgrade Your Studio Space Right Now !


UNCUCO S-06F 3-Rack Studio Desk For Audio Production Console
$1,950.00- Fully Customizable: Size, Logo, Color, Lighting, Style, Finish, Casters, Special Requirements
- Free Shipping to Worldwide, No Customs Duties.
- Zero Fee Door to Door Delivery, Multiple Protection Packing.
- Upgrade Your Studio Space Right Now !


UNCUCO S-07Q Recording Studio Table Music Audio Control Operation Desk
$878.00- Fully Customizable: Size, Logo, Color, Lighting, Style, Finish, Casters, Special Requirements
- Free Shipping to Worldwide, No Customs Duties.
- Zero Fee Door to Door Delivery, Multiple Protection Packing.
- Upgrade Your Studio Space Right Now !


UNCUCO S-01A 1.6M Studio Console Desk | Professional Audio Workstation Furniture
Original price was: $1,250.00.$921.00Current price is: $921.00.- Fully Customizable: Size, Logo, Color, Lighting, Style, Finish, Casters, Special Requirements
- Free Shipping to Worldwide, No Customs Duties.
- Zero Fee Door to Door Delivery, Multiple Protection Packing.
- Upgrade Your Studio Space Right Now !


UNCUCO Custom Recording Studio Table For Audio Control Console Mixer
$982.00- Fully Customizable: Size, Logo, Color, Lighting, Style, Finish, Casters, Special Requirements
- Free Shipping to Worldwide, No Customs Duties.
- Zero Fee Door to Door Delivery, Multiple Protection Packing.
- Upgrade Your Studio Space Right Now !

