
Have you ever encountered some intractable situation with your recording equipment while recording, editing and mixing and didn’t know how to fix it?
1. The sound is too thin/too much ambient noise
Getting as close to the mic as possible to increase the input signal will make your sound warmer (due to the “proximity effect”), so you don’t need to preamp the mic too much to avoid too much ambient noise being picked up.
Pro tip: The mic’s excavator boom helps you get as close to the mic as possible and easily adjust the position if needed.
2. Audio Distortion
Vocals are one of the most dynamic sound sources, which makes recording very tricky. Pay close attention to the input meter and adjust accordingly, pay attention to the input gain when recording to avoid clipping distortion (red light)! Mic preamp/input level meters are visible when confirming a recording, and gain settings for each input can be easily adjusted. When importing external audio, pay attention to the matching of the input signal. Use the Mic/Line level switch or use the PAD to attenuate the input signal to avoid distortion caused by excessive audio.

Pro tip: Before you start recording, test the volume louder than usual and adjust the gain until there is little clipping distortion (red light) at the loudest. Then lower the gain a little to ensure a safe range.
3. One track in the mix is a lot quieter than the others
Start by using the “normalize” effect on each track to bring them closer to the same amplitude. Then add these Plug-ins on each track in order: a de-esser (if needed), a medium compressor (3:1 ratio), an EQ (high/low pass filter set at 115dB) , and then a limiter. Using a limiter/maximizer on the Master channel also helps to balance the problem. Use volume automation to manually adjust different volume levels in your audio track.
Common recording problems and solutions

PRO TIP: Use the “Narration Vocal” preset in Logic Pro and GarageBand’s “Voice” library to zero out every level setting on every effect (EQ filter gain, compressor threshold, etc.). Then slowly adjust each track until it sounds good. You can start with the compressor threshold.
4. Headphone leakage produces feedback
The easiest fix is to turn off the headphones! Replace earbuds or small in-ear consumer headphones with closed-back monitoring headphones designed for recording, which wrap around the ear (called “over-ear”), and avoid open or semi-open headphones, which The back leaks a lot of sound and can cause more severe mic feedback in recordings.
5. Control the low frequency
To reduce the annoying low frequency boom, use a good saliva mask or microphone foam cover when recording. Note that being too far from the microphone can negatively affect the sound. (Environmental noise becomes louder)
If you want to use a low-cut filter to process, find the low-frequency location where the problem occurs and needs to be processed.
6. Clicks/Pops appearing in the recording
Close other applications that are not needed during recording. Over-processing your computer’s processor and RAM can cause missing samples to turn into random clicks/pops.
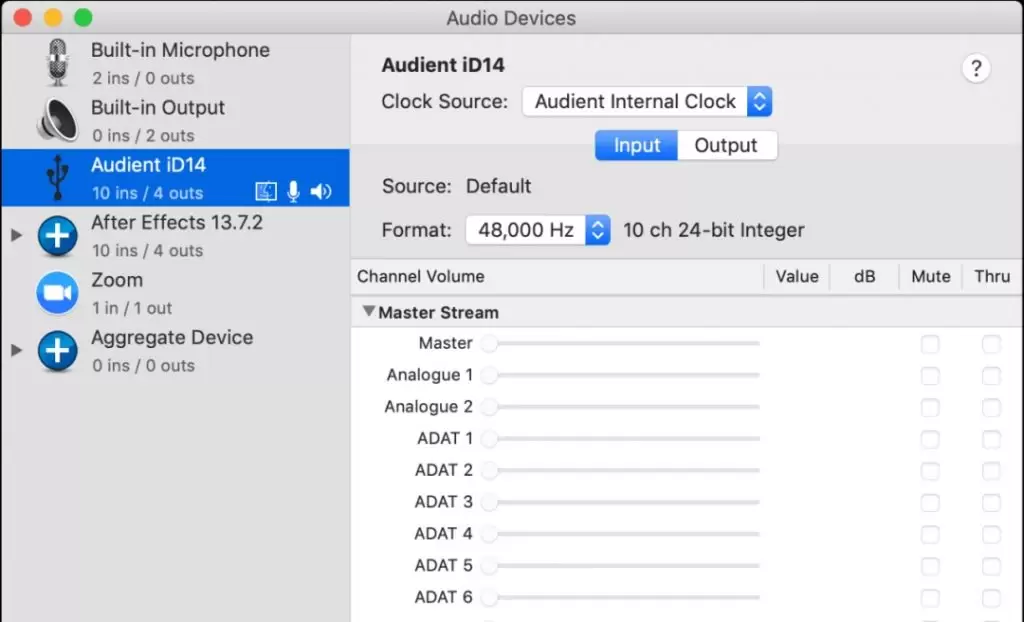
Double-check the settings to make sure the software, computer, and hardware select the correct sample rate and timing.
Also verify that the hardware sample rate and bit depth settings match the DAW software settings and computer system (Audio MIDI application on MacOS, and Sound > Playback Devices > Properties > Advanced on Windows). Set the recording interface connected to the computer to “Master” for the sample rate or timing.
Making great recordings requires more than just the ability to press buttons, turn knobs and click a mouse. Creating quality live/broadcast content requires attention to detail at every step of the recording, editing and mixing process.


